A craft room should feel like a dream — bright, inspiring, peaceful, and full of possibility. But let’s be honest: creativity often comes with clutter. Ribbons tangled together, paper stacks falling over, paint bottles hiding behind fabric rolls — it can quickly turn overwhelming.
The good news? With the right organization ideas, your craft room can become both beautiful and highly functional. Whether you have a full studio or just a small corner, these 22 craft room organization ideas will help you design a space that feels elegant, Pinterest-worthy, and truly magical.
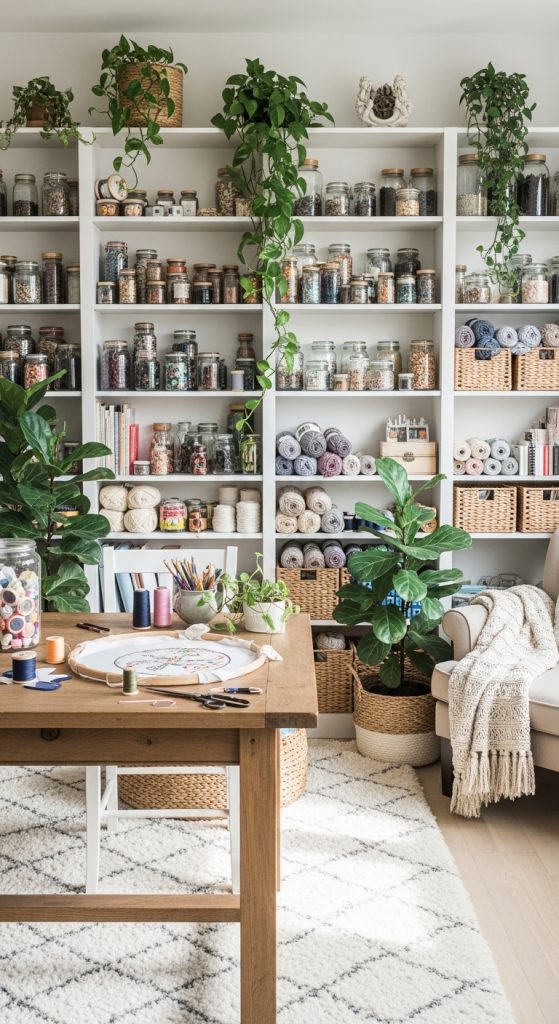
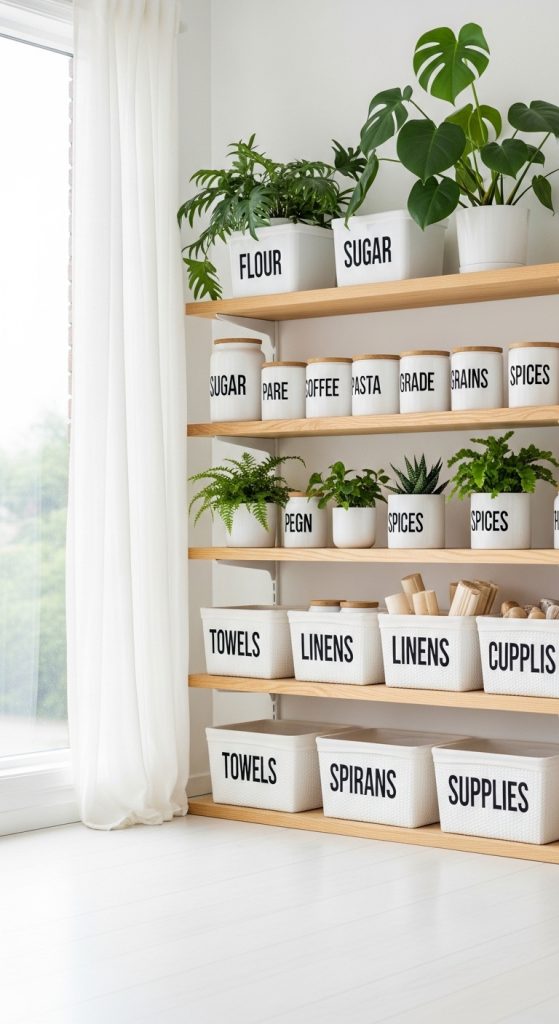
1. Wall-to-Wall Open Shelving Display
Open shelving is a game changer. Instead of hiding your supplies, turn them into décor. Install clean white or wooden floating shelves from floor to ceiling and arrange materials by color. Store yarn in woven baskets, display glass jars filled with buttons, and stack patterned paper neatly.
When everything is visible, it’s easier to use — and it looks stunning.
Use clear containers to create a cohesive aesthetic. Add small plants and decorative pieces between supplies to break visual clutter. The result is a bright, airy craft wall that feels like a boutique studio.
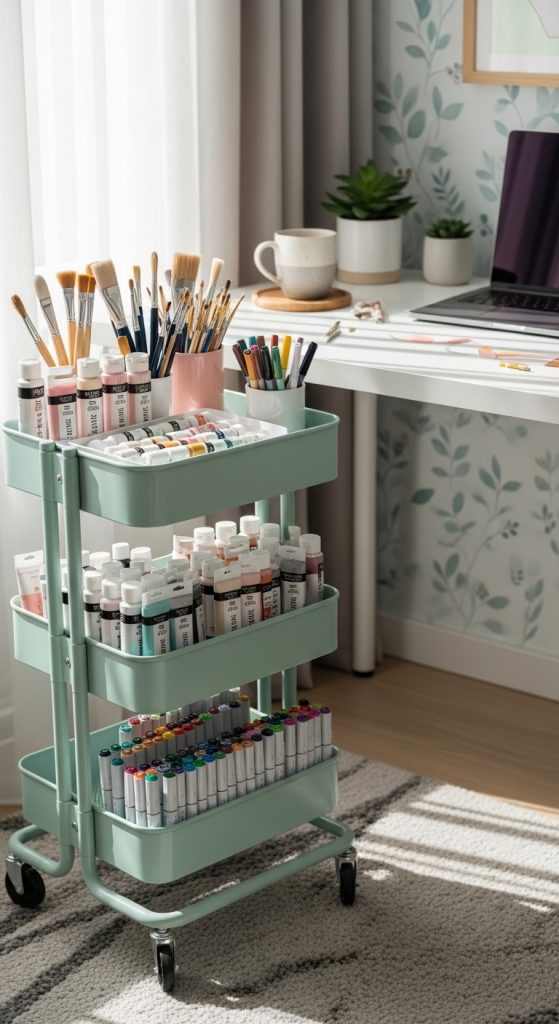
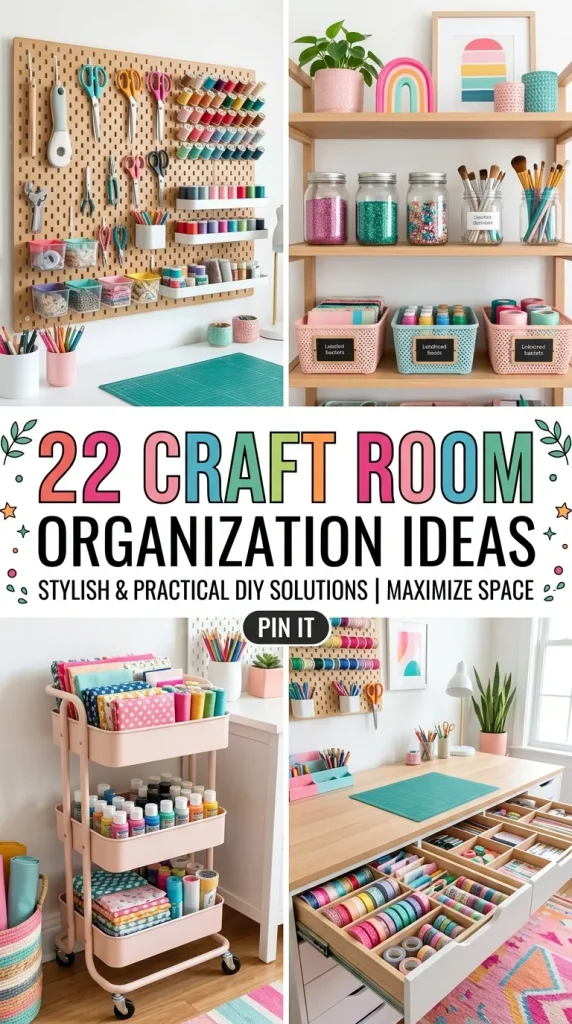
2. Rolling Craft Cart for Flexible Creativity
A rolling cart keeps your most-used tools within reach while giving you flexibility. Whether you’re painting, sewing, or scrapbooking, simply roll your cart beside your desk.
Choose a sleek metal or pastel-colored cart with three tiers. Organize by category — scissors and tools on top, paints and markers in the middle, paper or fabrics below.
This solution is perfect for small craft rooms because it maximizes vertical space and moves easily when needed.
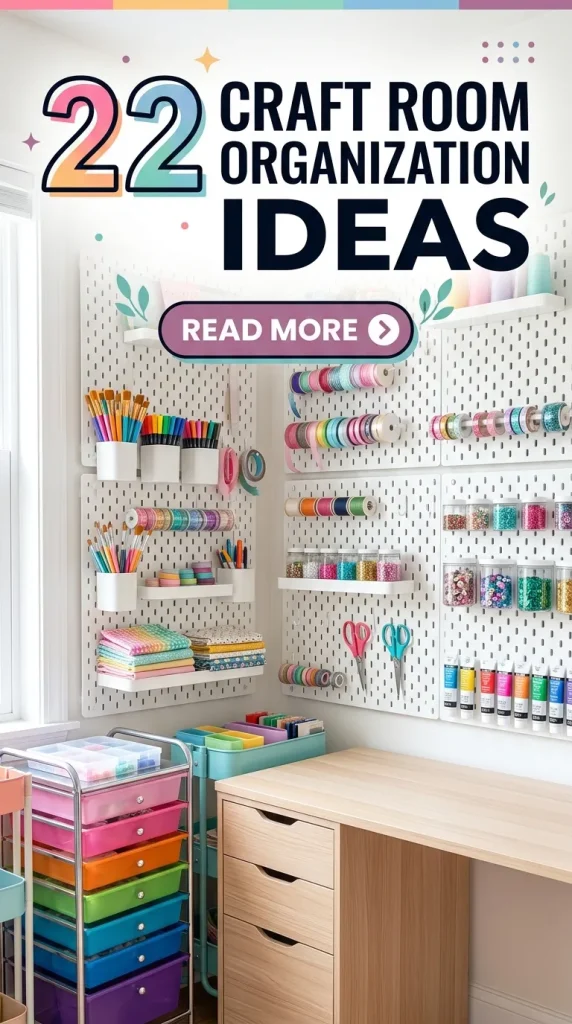
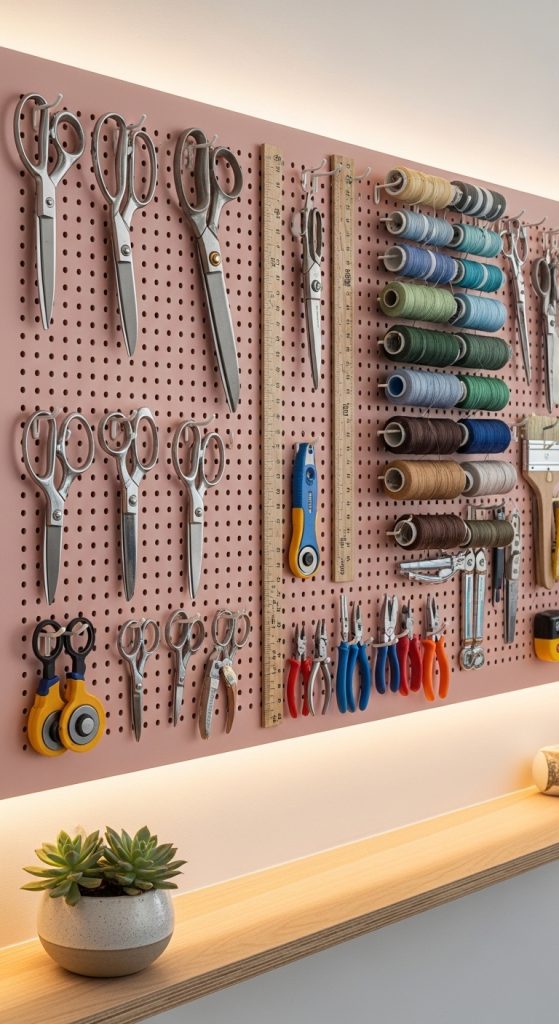
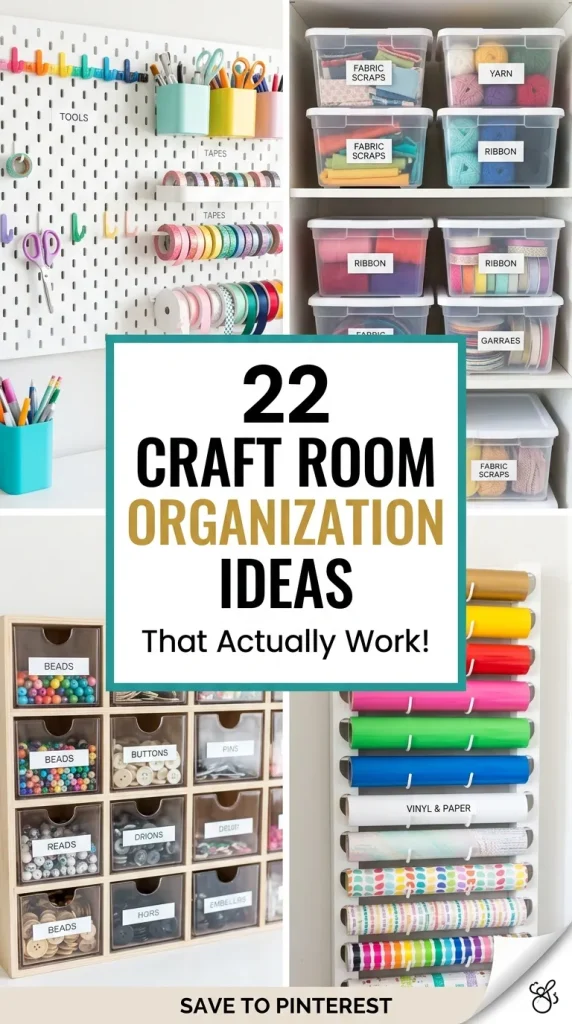
3. Pegboard Tool Wall
A pegboard wall is practical and stylish at the same time. Mount a large pegboard above your desk and customize it with hooks, baskets, and mini shelves.
Hang scissors, rulers, washi tapes, thread spools, and measuring tapes. Paint the pegboard a soft blush, sage green, or classic white to match your theme.
It creates a professional workshop vibe while keeping essentials organized and visible.
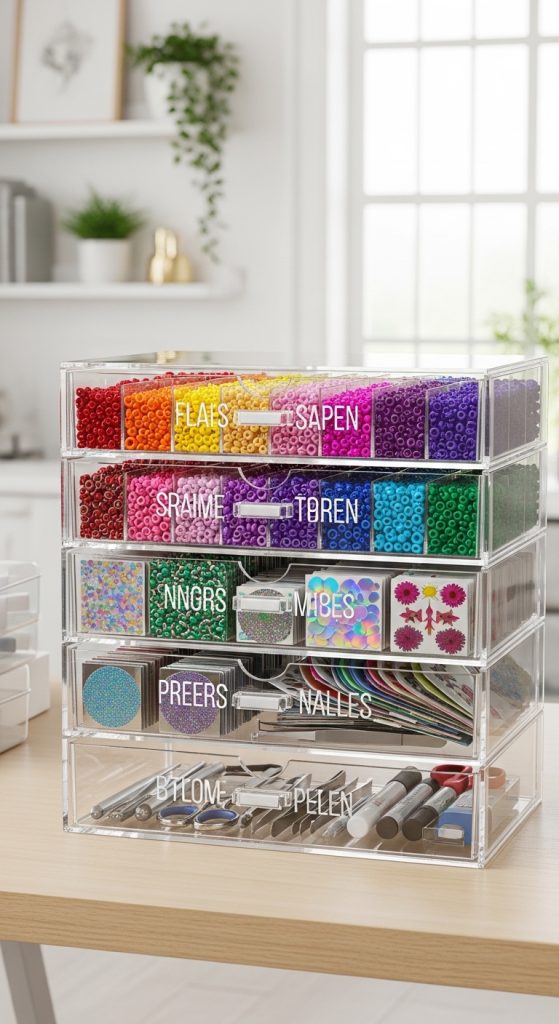
4. Clear Drawer Storage System
Transparent drawer units are ideal for organizing small items like beads, stickers, stamps, and embellishments. When everything is visible, you waste less time searching.
Label each drawer neatly with minimalist tags. Arrange supplies by color, type, or project category.
Stackable acrylic drawers keep the room looking clean and modern. The clear design prevents visual heaviness, making even a small space feel larger.
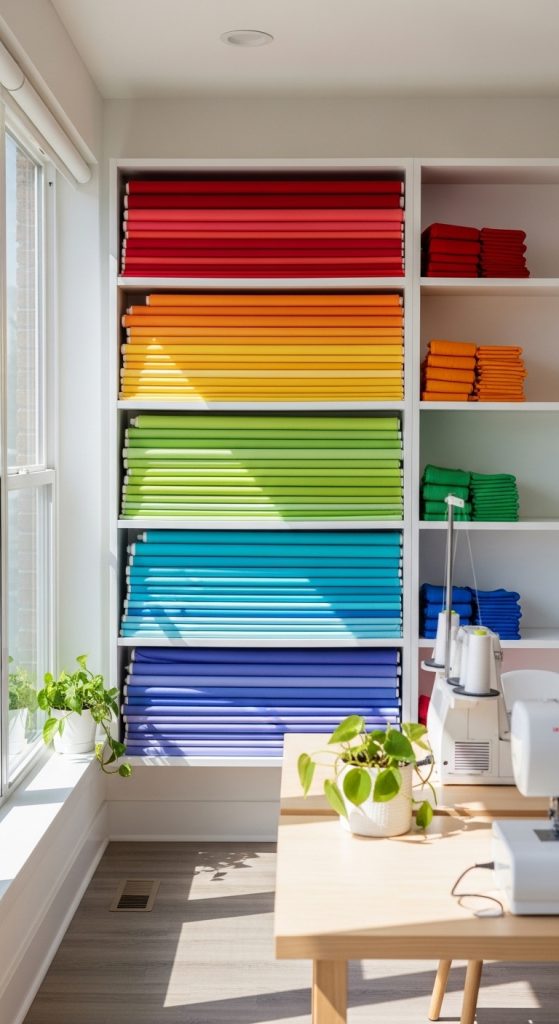
5. Fabric Storage with Vertical Filing
If you love sewing, fabric organization is essential. Instead of stacking fabric in piles, fold pieces uniformly and store them vertically like books.
Use magazine holders, filing bins, or custom cubbies. Organize by color gradient for a rainbow effect — it looks breathtaking and makes selection effortless.
This method not only saves space but also protects fabric from wrinkles and dust.
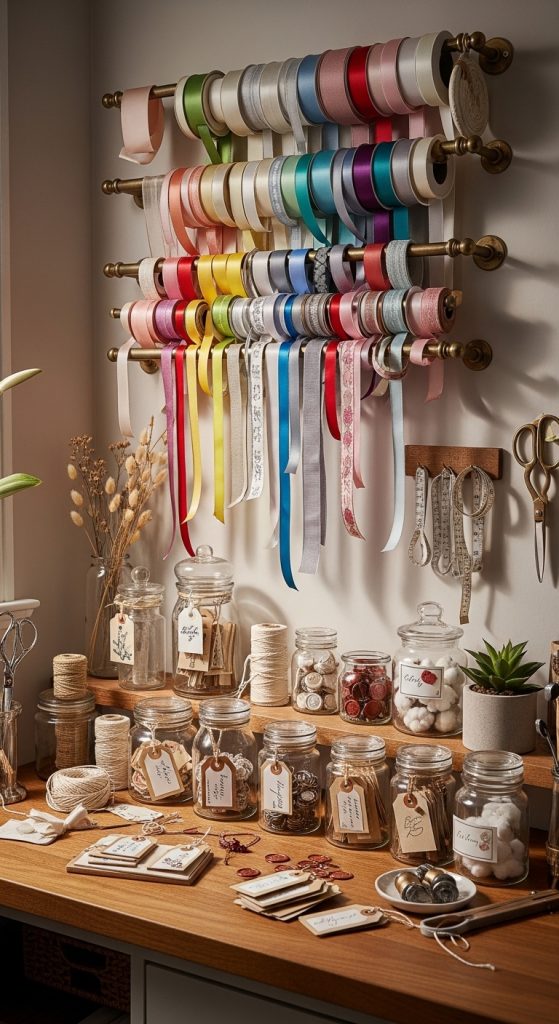
6. Dedicated Wrapping and Ribbon Station
Ribbons, gift wrap, and twine can easily become a tangled mess. Create a dedicated wrapping station using wall-mounted rods to hold ribbon spools.
Install a long shelf above it for gift bags and wrapping paper rolls. Use glass jars for tags, clips, and decorative embellishments.
This keeps everything tidy and turns your wrapping supplies into a decorative feature.
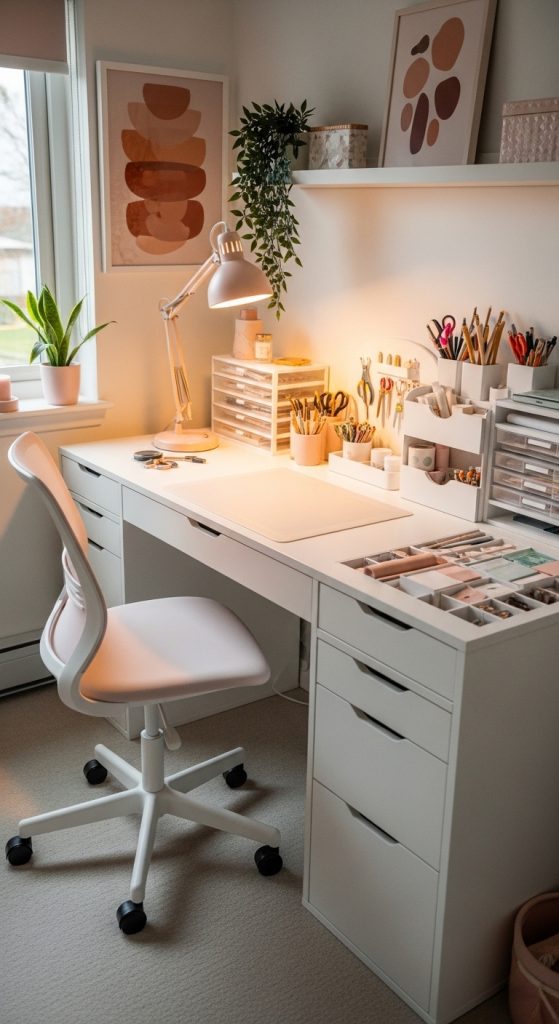
7. Built-In Desk with Hidden Storage
A custom built-in desk offers both workspace and hidden storage. Include drawers for tools, cabinets for larger machines, and open cubbies for decorative bins.
Choose light wood or white finishes to keep the room bright. Add a comfortable ergonomic chair and proper lighting.
The hidden storage keeps clutter out of sight while maintaining a clean, elegant aesthetic.
8. Label Everything for a Polished Look
Labels transform chaos into calm. Use matching label designs across jars, bins, drawers, and baskets.
Choose a simple black-and-white theme or soft neutral tones. Printed labels feel more refined than handwritten ones, especially if you’re going for a Pinterest-inspired aesthetic.
Consistency in labeling creates a visually pleasing, organized system that is easy to maintain.
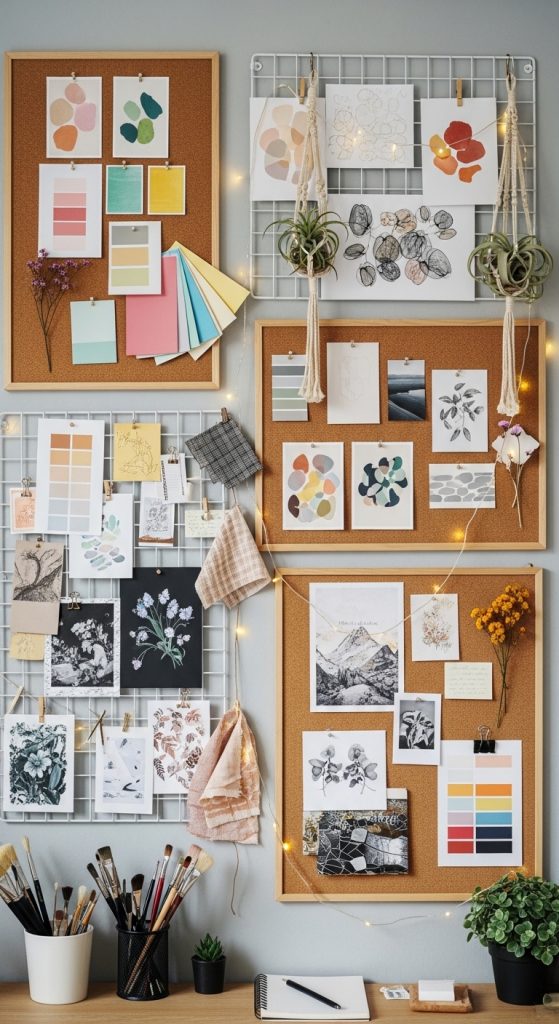
9. Inspiration Wall with Organized Mood Boards
Creativity thrives on inspiration. Dedicate one wall to a beautifully arranged mood board.
Use corkboards, clipboards, or framed wire grids to display sketches, color swatches, magazine cutouts, and project plans.
Keep it organized by sectioning themes. Avoid overcrowding — leave breathing space between pieces to maintain a clean look.
An organized inspiration wall keeps your creativity flowing without overwhelming the room.
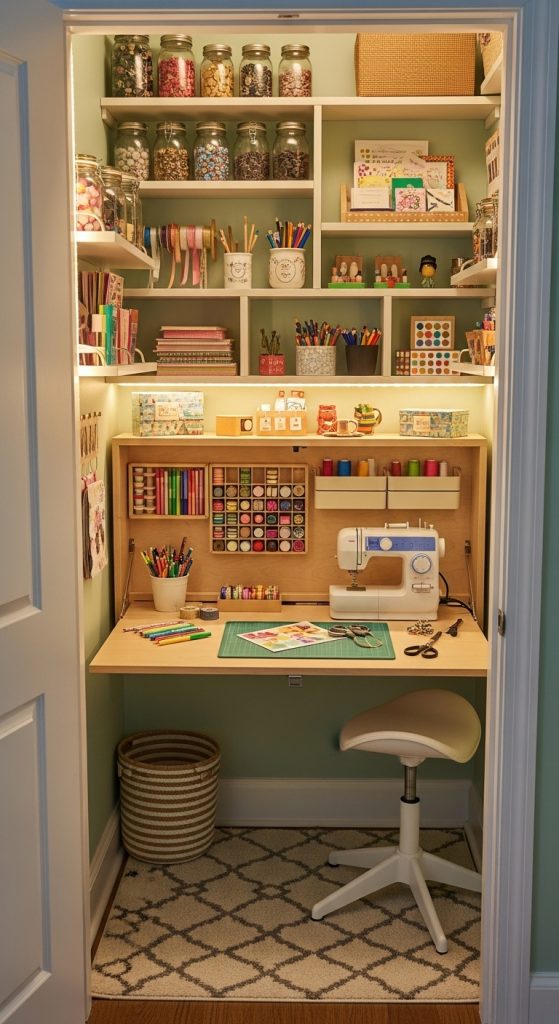
10. Hidden Closet Conversion Craft Room
If space is limited, transform a closet into a mini craft station. Remove closet doors or replace them with sliding barn doors.
Install shelves, small cabinets, and a fold-down desk. Add LED strip lighting for brightness.
When you’re done crafting, simply close the doors — instant clean look. It’s perfect for apartments or shared homes.
Final Thoughts
Craft room organization is about more than just storage — it’s about designing a space that inspires you every single day. When everything has a place, creativity flows freely. By combining function with beauty, you can create a craft room that feels calm, luxurious, and uniquely yours.
Start with one idea, then build from there. Soon, your creative space will feel like a Pinterest masterpiece.
More ideas to come.


