Spread the love

Welcoming a new life into the world is one of life’s most profound joys, and nothing expresses love quite like a handmade crochet creation. Handcrafted baby items hold a special place in family archives, often passed down as cherished heirlooms that carry the warmth, time, and dedication of the maker. Across Pinterest and modern nursery lookbooks, elegant handmade baby pieces have surged in popularity, blending timeless traditional stitches with clean, contemporary color palettes.

Whether you are preparing a nursery for your own little one, crafting a thoughtful baby shower gift, or stocking your handmade shop, these 20 elegant crochet baby ideas offer the perfect balance of beauty, safety, and practicality. Explore these detailed breakdowns, complete with material lists, step-by-step instructions, pro tips, and design variations to inspire your next project!
1. The Heirloom Lace Christening Gown

Brief Introduction

Exquisite, delicate, and deeply traditional, the Heirloom Lace Christening Gown is a masterpiece of fine crochet craftsmanship designed to mark life’s most sacred milestones.

What This Idea Means

This project utilizes fine-weight cotton thread and intricate lacework patterns (such as pineapple or shell stitches) to create a flowing, lightweight gown that drapes gracefully and photographs like an antique dream.

What is Needed to Make That Thing

  • Yarn: 3 to 4 spools of size 3 crochet cotton or fine fingering-weight bamboo yarn in pristine white or cream.
  • Hook Size: 2.5 mm (C-2) crochet hook.
  • Notions: Small satin ribbon for the bodice, fine tapestry needle, and matching mother-of-pearl buttons.

How to Make It

  1. The Bodice Foundation: Start at the neckline, working top-down with delicate double crochet clusters to form a fitted, refined yoke.
  2. Sleeve Integration: Leave armhole openings while continuing the stitch pattern evenly around the chest.
  3. Expanding the Skirt: Transition into an intricate openwork lace pattern (such as classic pineapples) and increase stitches gradually to create a wide, billowing skirt.
  4. Finishing Edges: Add a delicate picot edge along the hemline and sleeve cuffs.
  5. Fastening: Attach pearl buttons down the back opening and thread a soft satin ribbon through the waistline.

Tips and Variations

  • Tip: Always use mercerized cotton thread for Christening gowns to give the fabric a subtle, beautiful sheen and structural crispness.
  • Variation: Add a pale pink or soft blue silk slip underneath the white lace layer for a subtle hint of pastel color.

2. Minimalist Organic Cotton Baby Bonnet

Brief Introduction

Charming, vintage-inspired, and gentle on sensitive newborn skin, the Minimalist Organic Cotton Baby Bonnet is a timeless accessory that frames a baby’s face with pure sweetness.

What This Idea Means

Focusing on clean lines and natural textures, this bonnet style avoids heavy embellishments in favor of smooth, breathable stitches that provide lightweight warmth without overheating.

What is Needed to Make That Thing

  • Yarn: 1 skein of 100% organic cotton DK-weight yarn in oatmeal, sage, or soft butter.
  • Hook Size: 3.5 mm (E-4) crochet hook.
  • Notions: Tapestry needle and measuring tape.

How to Make It

  1. The Crown Circle: Start with a flat circular foundation using half double crochet stitches, expanding until it fits the back crown of the baby’s head.
  2. Working the Body: Work straight rows back and forth to form the depth of the bonnet, cupping around the back of the neck.
  3. Neck Banding: Decrease slightly across the lower neck edge to create a snug, tailored fit against the throat.
  4. Chin Ties: Crochet a long chain or braided cord on each front corner to serve as soft tie straps.
  5. Border Trim: Finish the face opening with a simple, neat crab stitch (reverse single crochet) border.

Tips and Variations

  • Tip: Organic plant fibers are ideal for baby garments because they are breathable, hypoallergenic, and machine-washable.
  • Variation: Add a subtle textured shell stitch trim along the face frame for a gentle, decorative touch.

3. Vintage Granny Square Baby Blanket

Brief Introduction

A beloved classic reimagined for the modern nursery, the Vintage Granny Square Baby Blanket combines cheerful colors into a cozy, heirloom-quality wrap.

What This Idea Means

This project celebrates traditional square motifs joined seamlessly together, offering endless layout possibilities and serving as an ideal stash-buster for quality yarn scraps.

What is Needed to Make That Thing

  • Yarn: Assorted DK or sport-weight baby yarns in 5 harmonious pastel colors (e.g., mint, lavender, cream, dusty rose, lemon).
  • Hook Size: 4.0 mm (G-6) crochet hook.
  • Notions: Tapestry needle for weaving ends and blocking pins.

How to Make It

  1. Crafting the Squares: Crochet 30 to 36 small granny squares (typically 4 rounds each), ensuring uniform sizing across all colors.
  2. Blocking: Lightly steam block each square so they lay completely flat and have crisp, even edges.
  3. Layout Arrangement: Arrange the squares in a balanced color grid on a flat surface to plan your visual balance.
  4. Joining: Join the squares using a flat braid join, whip stitch, or join-as-you-go method with cream-colored yarn.
  5. Border: Finish the entire blanket perimeter with 3 rounds of classic shell stitches.

Tips and Variations

  • Tip: Weave in your yarn tails as you go to make the final assembly process fast and stress-free.
  • Variation: Use solid-colored squares with a contrasting dark neutral joining yarn for a striking, modern stained-glass effect.

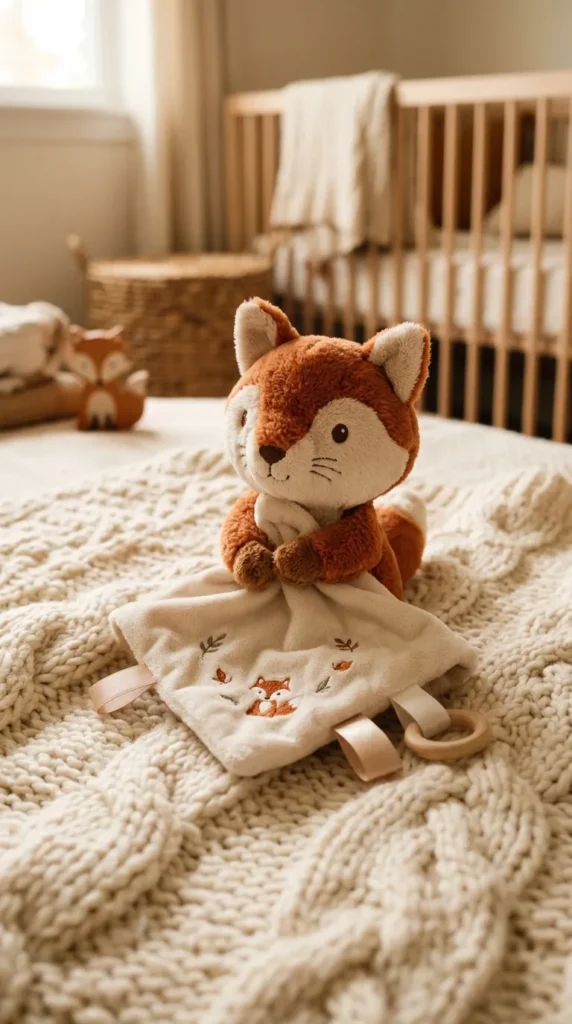
4. Woodland Fox Security Blanket (Lovey)

Brief Introduction

Part cuddly security blanket, part adorable stuffed toy, the Woodland Fox Lovey provides comforting tactile companionship for a growing baby.

What This Idea Means

Featuring a small, plush fox head attached to the center of a mini textured blanket, this lovey offers tiny hands something soft to grip, hold, and snuggle during naptime.

What is Needed to Make That Thing

  • Yarn: Soft worsted-weight yarn in burnt orange, cream, and charcoal black.
  • Hook Size: 4.5 mm (7) crochet hook.
  • Notions: Polyfill stuffing, safety eyes (or embroidery thread for a baby-safe stitched face), and tapestry needle.

How to Make It

  1. The Blanket Base: Start in the center and work outward in rounds using the griddle stitch or moss stitch to create a 12×12 inch square mini blanket.
  2. The Fox Head: Crochet a small spherical head in orange, adding white snout details and triangular pointed ears with black tips.
  3. Facial Details: Embroider closed sleeping eyes and a tiny nose using black embroidery floss for complete baby safety.
  4. Assembly: Stuff the fox head firmly with polyfill and securely sew it to the center corner or middle of the blanket base.
  5. Border: Add a textured picot border around the blanket edge.

Tips and Variations

  • Tip: Always embroider facial features instead of using plastic safety eyes if the lovey is intended for an infant under one year old.
  • Variation: Swap the fox for a sleepy bear, sweet bunny, or gentle fawn.

5. Classic Baby Booties with Satin Ribbon

Brief Introduction

Dainty, elegant, and irresistibly cute, these classic cuffed baby booties stay securely on tiny feet while adding a polished touch to any newborn outfit.

What This Idea Means

Using basic stitches shaped with clever increases and decreases, these booties mimic the look of store-bought leather shoes while offering the soft comfort of handmade yarn.

What is Needed to Make That Thing

  • Yarn: 1 skein of DK baby yarn in crisp white or soft cream.
  • Hook Size: 3.0 mm crochet hook.
  • Notions: Narrow double-faced satin ribbon (pink, blue, or white) and tapestry needle.

How to Make It

  1. The Sole: Chain a foundation oval and work rows of half double crochet around it, increasing at the toe and heel to form the flat sole.
  2. Shoe Walls: Work straight rounds in back loops only to build up the sides of the bootie.
  3. Toe Shaping: Decrease stitches across the front top section to create the rounded toe curve.
  4. The Cuff: Fold down the top rows to create a neat rolled cuff, adding eyelet holes for your ribbon.
  5. Ribbon Weaving: Thread satin ribbon through the eyelets and tie it in a neat bow at the front ankle.

Tips and Variations

  • Tip: Keep your tension firm so the bootie holds its structural shape and doesn’t slip off active little feet.
  • Variation: Add miniature crocheted flowers or pom-poms to the front toes for extra charm.

6. Delicate Floral Headband and Bootie Set

Brief Introduction

A darling matching set featuring a stretchy, comfortable headband adorned with a 3D crochet blossom paired with coordinating slip-on booties.

What This Idea Means

Designed for special occasions, family photoshoots, or sunny weekend outings, this set provides maximum aesthetic appeal with minimal weight.

What is Needed to Make That Thing

  • Yarn: Small amounts of sport-weight mercerized cotton in peach, olive green, and cream.
  • Hook Size: 3.5 mm (E-4) crochet hook.
  • Notions: Tapestry needle and soft elastic cord (optional for headband backing).

How to Make It

  1. The Headband Base: Crochet a long, stretchy band using slip stitches in the back loop only, matching the circumference of the baby’s head.
  2. Crocheting the Flowers: Create a set of layered 3D roses and small flat leaves using fine cotton thread.
  3. Assembling the Set: Sew the floral appliqués securely onto the side of the headband and onto the toes of the matching booties.
  4. Bootie Foundation: Crochet simple Mary-Jane style booties with a button strap to complete the ensemble.
  5. Finishing: Weave in all loose ends cleanly.

Tips and Variations

  • Tip: Thread a thin piece of soft elastic through the inside of the crochet headband to ensure it stays snug without leaving marks.
  • Variation: Use multi-colored variegated yarn for the flowers to create a natural, hand-painted watercolor effect.

7. Textured Bobble Stitch Baby Cardigan

Brief Introduction

Warm, huggable, and full of charming texture, the Bobble Stitch Baby Cardigan features rows of tactile raised bumps that resemble little pearls of yarn.

What This Idea Means

This heirloom garment combines structural warmth with delightful tactile play, making it both a cozy winter layer and a stunning display of crochet skill.

What is Needed to Make That Thing

  • Yarn: 3 to 4 skeins of anti-pilling acrylic or superwash merino DK yarn.
  • Hook Size: 4.0 mm (G-6) crochet hook.
  • Notions: 4 to 5 wooden or coconut buttons and tapestry needle.

How to Make It

  1. Yoke Construction: Start at the neckline, working top-down with raglan increases to shape the shoulders and sleeves seamlessly.
  2. Body and Bobbles: Incorporate bobble stitches at regular intervals in the lower body rows to create a raised polka-dot texture.
  3. Sleeves: Work the sleeves in the round, tapering down to a ribbed wrist cuff.
  4. Buttonbands: Add sturdy ribbed front button bands along the cardigan opening.
  5. Button Attachment: Sew wooden buttons securely through the pre-made buttonhole spaces.

Tips and Variations

  • Tip: Bobble stitches consume extra yarn; make sure you purchase an extra skein to avoid running out midway through the body.
  • Variation: Use contrasting colors for the bobbles to create a playful confetti effect against a neutral background.

8. Pastel Rainbow Teething Ring Toy

Brief Introduction

Combining natural untreated beech wood with soft, tactile crochet spheres, this pastel rainbow teething ring is both soothing for sore gums and visually delightful.

What This Idea Means

It provides a safe, Montessori-inspired sensory toy that engages a baby’s sense of touch and sight while offering safe relief during the teething phase.

What is Needed to Make That Thing

  • Yarn: Small scrap amounts of 100% cotton yarn in soft pastel rainbow shades.
  • Hook Size: 3.0 mm crochet hook.
  • Notions: Untreated wooden teething ring (smooth, food-safe) and polyfill or fabric scraps.

How to Make It

  1. Crocheting Spheres/Rings: Crochet small, tightly-stitched covers or spheres that fit snugly around sections of the wooden ring.
  2. Textured Accents: Create small cotton beads or rainbow arches using single crochet stitches stuffed firmly with clean cotton scrap fabric.
  3. Attaching to Wood: Whipstitch the crochet pieces securely around the wooden ring, ensuring knots are double-secured and hidden.
  4. Safety Check: Tug firmly on all attached components to guarantee they are completely secure and choking-hazard free.
  5. Final Polish: Wipe the wooden portion with organic coconut oil for a safe, smooth finish.

Tips and Variations

  • Tip: Always use 100% unmercerized cotton yarn for teething toys because it absorbs moisture well and can be easily washed and sanitized.
  • Variation: Add crinkle material inside the fabric cloud attachments for auditory sensory stimulation.

9. Seamless Newborn Sleep Sack

Brief Introduction

Cozy, secure, and designed for safe sleeping comfort, the Seamless Newborn Sleep Sack keeps a baby warm without the need for loose blankets in the crib.

What This Idea Means

This wearable blanket design features a roomy lower pouch for kicking legs and a snug upper bodice with shoulder straps, crafted in a breathable stitch.

What is Needed to Make That Thing

  • Yarn: 4 to 5 skeins of ultra-soft bamboo-cotton blend worsted yarn.
  • Hook Size: 5.0 mm (H-8) crochet hook.
  • Notions: Large wooden toggle buttons or secure zipper.

How to Make It

  1. The Bottom Pouch: Start from the bottom hem and work upward in joined rounds using a stretchy half double crochet stitch to create a spacious sack.
  2. Dividing for Front and Back: Split the work at the armpits to work the front and back panels flat in rows.
  3. Shoulder Straps: Shape the shoulder straps and attach secure buttons or loops.
  4. Sleeveless Armholes: Add a clean single crochet trim around the arm openings and neck.
  5. Final Inspection: Ensure all seams are flat and smooth against sensitive infant skin.

Tips and Variations

  • Tip: Use a bamboo yarn blend for sleep sacks because it has natural temperature-regulating properties to keep the baby comfortable.
  • Variation: Incorporate an inverted box pleat in the front for extra leg movement room.

10. Cute Bear Ear Hooded Baby Towel

Brief Introduction

Make bath time magical with a plush, absorbent hooded baby towel featuring adorable little bear ears perched on top of the hood.

What This Idea Means

This project transforms standard bathing into a playful experience, wrapping a wet baby in cozy warmth while giving them an irresistibly cute animal look.

What is Needed to Make That Thing

  • Yarn: 5 to 6 skeins of soft cotton-blend boucle or plush cotton yarn.
  • Hook Size: 6.0 mm (J-10) crochet hook.
  • Notions: Large tapestry needle and store-bought organic cotton baby bath towel (or crochet the main towel body using absorbent stitch grids).

How to Make It

  • The Hood Base: Crochet a triangular or square hood piece using half double crochets for a dense, absorbent fabric.
  • Crafting Bear Ears: Crochet two small semi-circle ear flaps and stuff them lightly.
  • Attaching Ears: Sew the ears securely to the top corners of the hood.
  • Joining to Towel: Stitch the finished hood securely to one corner of a large, high-quality cotton bath towel.
  • Edge Trim: Add a matching cotton border around the entire towel perimeter to prevent fraying.

Tips and Variations

  • Tip: Choose lightweight, highly absorbent cotton yarn rather than heavy acrylic, as acrylic does not absorb water well after baths.
  • Variation: Swap bear ears for bunny ears or playful kitten triangles.

11. Scandinavian Fair Isle Baby Sweater

Brief Introduction

Inspired by Nordic winter traditions, this charming baby sweater features classic geometric snowflake motifs across the chest yoke.

What This Idea Means

Using tapestry crochet colorwork techniques, this sweater offers incredible warmth and a high-end boutique aesthetic suitable for holiday cards and family gatherings.

What is Needed to Make That Thing

  • Yarn: 2 skeins of cream wool-blend yarn and 1 skein of deep forest green.
  • Hook Size: 4.0 mm (G-6) crochet hook.
  • Notions: 3 small wooden buttons and tapestry needle.

How to Make It

  1. Top-Down Yoke: Start at the neckline with ribbing, then work increasing rows in plain cream.
  2. Colorwork Chart: Integrate your Fair Isle snowflake chart across the chest yoke, carrying the unused yarn color inside your stitches.
  3. Dividing Sleeves: Separate the armhole stitches from the main body once colorwork is complete.
  4. Body and Hem: Continue working the body downward in solid cream, finishing with a ribbed bottom hem.
  5. Sleeves & Buttons: Work the sleeves in the round and attach wooden buttons along the shoulder placket.

Tips and Variations

  • Tip: Keep your carried floats loose on the inside of the work so the sweater maintains natural stretch and flexibility.
  • Variation: Use navy blue and white for a classic nautical winter aesthetic.

12. Chevron Stripe Modern Baby Blanket

Brief Introduction

Dynamic, stylish, and visually striking, the Chevron Stripe Modern Baby Blanket introduces sharp zig-zag waves in a soothing palette of modern nursery colors.

What This Idea Means

The chevron (or ripple) stitch creates natural peaks and valleys that provide a rhythmic, meditative crochet experience and a stunning geometric result.

What is Needed to Make That Thing

  • Yarn: 4 skeins of DK baby yarn in 4 complementary tones (e.g., slate grey, white, mustard, and sage).
  • Hook Size: 4.5 mm (7) crochet hook.
  • Notions: Tapestry needle.

How to Make It

  1. Foundation Chain: Chain a multiple of the chevron pattern repeat plus turning chains to reach your desired blanket width.
  2. Establishing the Ripple: Work rows of double crochet, incorporating strategic increases at the peaks and decreases at the valleys to form the zig-zag waves.
  3. Striping Sequence: Change colors every 2 rows to create clean, rhythmic horizontal chevron stripes.
  4. Length Adjustment: Continue repeating rows until the blanket reaches your desired square or rectangular length.
  5. Border: Add a clean single crochet border along the top and bottom edge to straighten the initial foundation and final row.

Tips and Variations

  • Tip: Count your stitches carefully at the end of every single row—chevron increases and decreases are easy to miscount if distracted!
  • Variation: Use a self-striping gradient yarn cake to let the zig-zags shift colors automatically without cutting yarn.

13. Sweetheart Heart-Motif Baby Dress

Brief Introduction

Adorable and brimming with love, the Sweetheart Heart-Motif Baby Dress features sweet openwork hearts integrated into the skirt design.

What This Idea Means

This dress is a wonderful project for special occasions, combining delicate lace techniques with a comfortable, wearable silhouette for toddlers or babies.

What is Needed to Make That Thing

  • Yarn: 2 to 3 skeins of fingering-weight cotton yarn in soft pink or ivory.
  • Hook Size: 3.5 mm (E-4) crochet hook.
  • Notions: Satin ribbon and small pearl buttons.

How to Make It

  1. Bodice: Work a simple fitted yoke using half double crochet stitches, leaving arm openings.
  2. Skirt Foundation: Expand stitches evenly at the waistline to begin the skirt panels.
  3. Heart Lace Pattern: Follow a stitch chart that incorporates skipped stitches and double crochet clusters to form rows of delicate openwork hearts.
  4. Hemline: Finish with a pretty scalloped border along the skirt bottom.
  5. Details: Tie a satin ribbon around the waistline and secure buttons at the back neck opening.

Tips and Variations

  • Tip: Block the finished dress gently with steam to open up the heart stitch windows and make the motif crisp.
  • Variation: Make the dress in bold red for holiday celebrations or Valentine’s Day photo shoots.

14. Newborn Milestone Photo Prop Layette

Brief Introduction

Capture baby’s first year in style with a coordinated milestone photo prop set featuring a monthly number badge, mini sunhat, and matching diaper cover.

What This Idea Means

This curated photography set helps parents document monthly growth milestones with a professional, handcrafted aesthetic that pops in pictures.

What is Needed to Make That Thing

  • Yarn: 3 skeins of smooth cotton yarn in neutral oatmeal or cream.
  • Hook Size: 4.0 mm (G-6) crochet hook.
  • Notions: Removable numbered cards or interchangeable crochet number badges (1 through 12).

How to Make It

  1. Diaper Cover: Crochet a simple, adjustable diaper cover with button fasteners at the hips for quick and easy outfit changes during shoots.
  2. Sunhat: Create a sweet, floppy-brimmed sunhat that frames the newborn’s face softly.
  3. Milestone Badges: Crochet small circular plaques and embroider numbers 1 through 12 on them, or attach interchangeable number tags.
  4. Finishing Touches: Add tiny leather tags or wooden buttons for a rustic, boutique finish.
  5. Care: Ensure all pieces are washable for quick cleanups after photo sessions.

Tips and Variations

  • Tip: Neutral earth tones work best for photography props because they keep the focus entirely on the baby’s face and expressions.
  • Variation: Use seasonal accent colors for different months (e.g., pastel pastels in spring, warm rust in autumn).

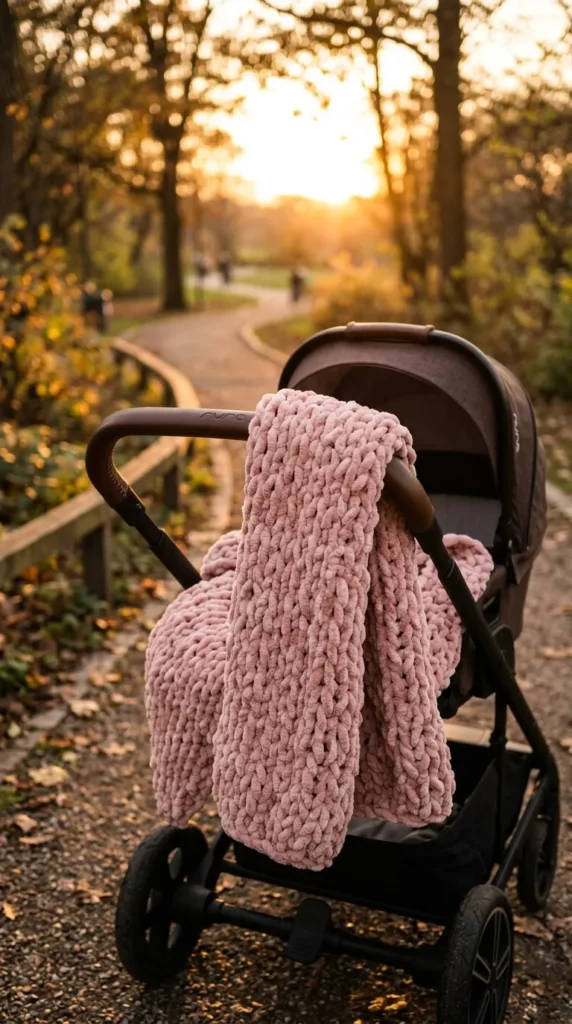
15. Chunky Chenille Stroller Blanket

Brief Introduction

Ultra-plush, velvety, and incredibly warm, the Chunky Chenille Stroller Blanket provides luxurious comfort during chilly outdoor walks.

What This Idea Means

Utilizing jumbo or bulky chenille yarn, this blanket works up remarkably fast and creates a cloud-like texture that babies love to touch and hold.

What is Needed to Make That Thing

  • Yarn: 3 to 4 skeins of super bulky chenille or velvet yarn in soft grey, blush, or cream.
  • Hook Size: 8.0 mm (L-11) or 9.0 mm crochet hook.
  • Notions: Tapestry needle.

How to Make It

  1. Foundation Chain: Chain loosely to your desired stroller blanket width (approx. 30 inches).
  2. Simple Stitches: Work in basic half double crochet or moss stitch rows—chenille yarn is so textured that simple stitches show off its plush beauty best.
  3. Maintaining Tension: Keep your tension even and relaxed to ensure the blanket remains drapey and flexible rather than stiff.
  4. Finishing Edges: Work a final round of single crochet around the entire perimeter for a clean border.
  5. Weaving Ends: Securely anchor and weave your chenille yarn tails, as velvet yarn can slip if not tied off carefully.

Tips and Variations

  • Tip: Chenille yarn can shed slightly when cut; secure your starting and ending tails with a dab of fabric glue or extra secure knots.
  • Variation: Combine two contrasting velvet colors for a bold, modern striped stroller blanket.

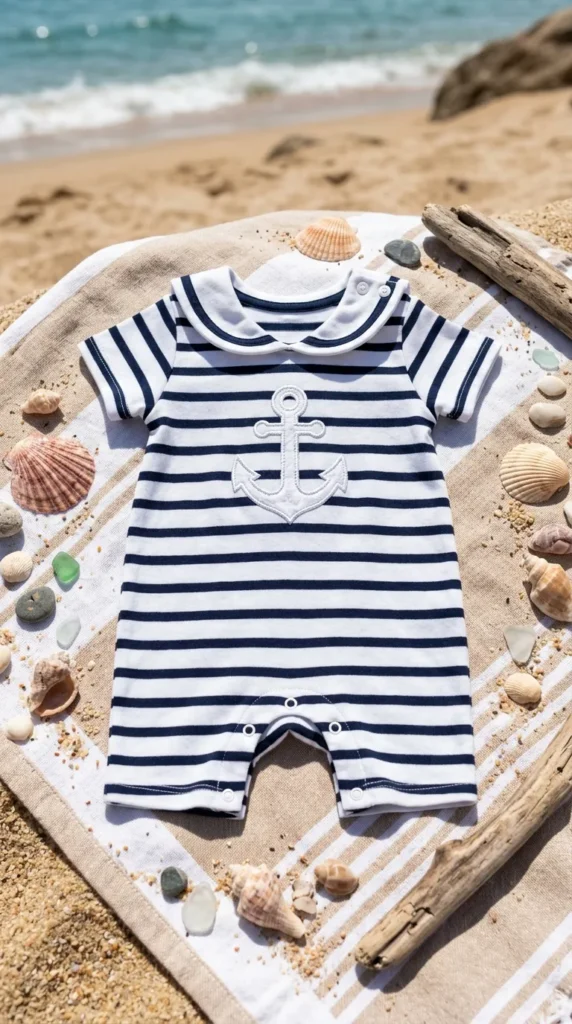
16. Tiny Sailor Romper with Anchor Appliqué

Brief Introduction

Nautical, charming, and undeniably adorable, the Tiny Sailor Romper features a classic navy-and-white color block design with a hand-stitched anchor appliqué.

What This Idea Means

This playful garment brings seaside style to baby fashion, offering a comfortable, all-in-one outfit with easy button access for diaper changes.

What is Needed to Make That Thing

  • Yarn: Cotton DK yarn in navy blue, crisp white, and bright red.
  • Hook Size: 3.5 mm (E-4) crochet hook.
  • Notions: Small wooden buttons and tapestry needle.

How to Make It

  1. Shorts Foundation: Start with the legs, working separate short tubes before joining them together in the center.
  2. Body Construction: Work upward from the joined crotch to the chest in navy and white stripes.
  3. Anchor Appliqué: Crochet a small anchor motif in white or red thread and sew it securely onto the chest center.
  4. Straps: Add adjustable shoulder straps with buttonholes.
  5. Crotch Fastening: Install secure buttons along the inner leg seams for easy diaper access.

Tips and Variations

  • Tip: Cotton yarn is essential for rompers because it holds its shape during wear and breathes well in warm weather.
  • Variation: Swap the anchor for a tiny sailboat or steering wheel motif.

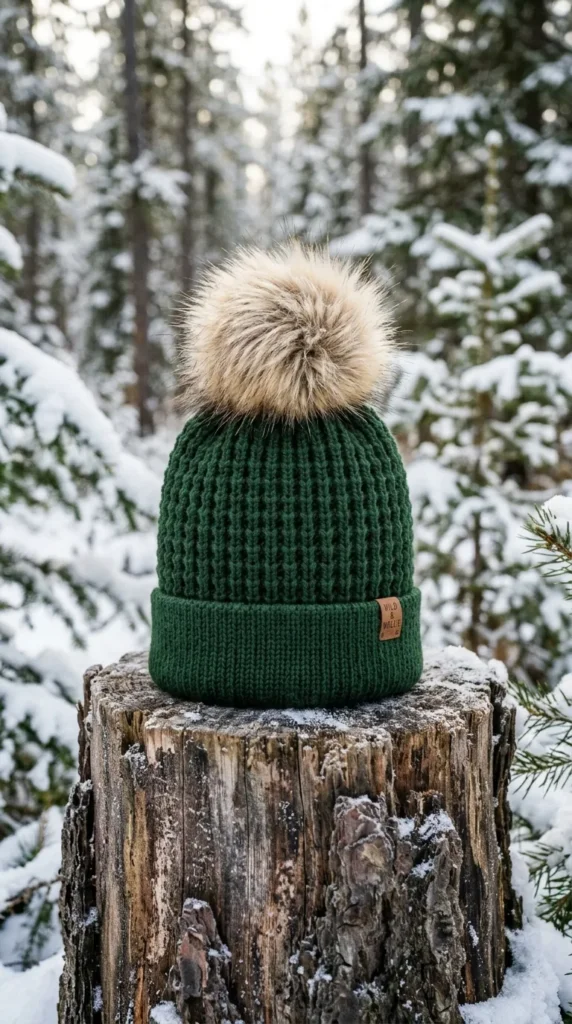
17. Waffle Stitch Thermal Baby Hat

Brief Introduction

Snug, architectural, and exceptionally warm, the Waffle Stitch Thermal Baby Hat locks in heat while providing an engaging 3D grid texture.

What This Idea Means

The waffle stitch creates pockets of thermal insulation, making this hat an ideal choice for protecting little ears during crisp autumn and winter walks.

What is Needed to Make That Thing

  • Yarn: 1 skein of worsted-weight superwash wool or soft acrylic yarn.
  • Hook Size: 4.5 mm (7) crochet hook.
  • Notions: Tapestry needle and optional faux-fur pom-pom.

How to Make It

  1. Ribbed Brim: Start with a snug, stretchy ribbed band that fits comfortably around the baby’s head circumference.
  2. Waffle Stitch Transition: Pick up stitches along the brim edge and begin working the waffle stitch pattern (alternating front post double crochets and regular double crochets).
  3. Building Height: Continue working the waffle grid pattern upwards until the hat covers the crown of the head.
  4. Crown Decrease: Decrease stitches evenly across the top rows to close the crown cleanly.
  5. Pom-Pom Attachment: Attach a fluffy pom-pom to the top center.

Tips and Variations

  • Tip: Waffle stitch is a yarn-eater; ensure you have enough yardage before starting the hat body.
  • Variation: Omit the pom-pom for sleeping caps or car seat safety compliance.

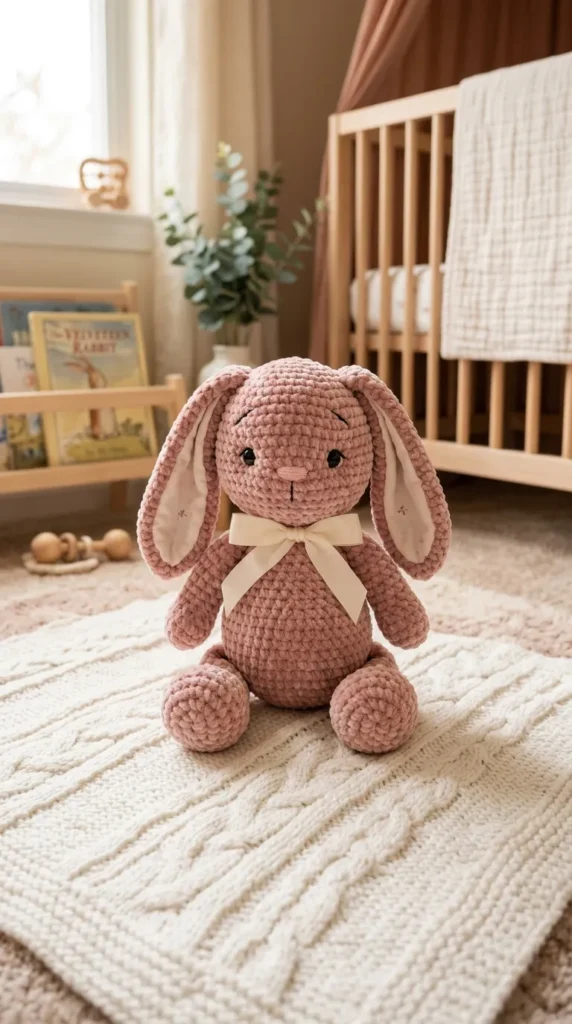
18. Soft Velvet Bunny Snuggle Toy

Brief Introduction

Irresistibly soft and comforting, the Soft Velvet Bunny Snuggle Toy features long floppy ears and a gentle plush body designed to be a baby’s first best friend.

What This Idea Means

This amigurumi-style stuffed animal is crafted from velvety plush yarn, creating a velvety texture that is soothing for babies to cuddle.

What is Needed to Make That Thing

  • Yarn: 1 skein of plush velvet yarn in dusty pink or cream, plus small scrap of pink embroidery floss.
  • Hook Size: 4.0 mm (G-6) crochet hook.
  • Notions: Polyfill stuffing, tapestry needle, and stitch markers.

How to Make It

  1. The Body & Head: Crochet a pear-shaped amigurumi body and round head in continuous spiral rounds of single crochet.
  2. Floppy Ears: Create two long, elegant bunny ears and sew them securely to the top crown.
  3. Facial Embroidery: Embroider sleepy eyes, a tiny pink nose, and whiskers using embroidery thread.
  4. Arms and Legs: Crochet short stubby limbs and attach them securely to the torso.
  5. Safety Check: Ensure all parts are stitched with heavy-duty thread to withstand infant tugging.

Tips and Variations

  • Tip: Velvet yarn can be slippery; use locking stitch markers to keep track of your rounds easily.
  • Variation: Add a tiny embroidered scarf around the bunny’s neck for an extra pop of color.

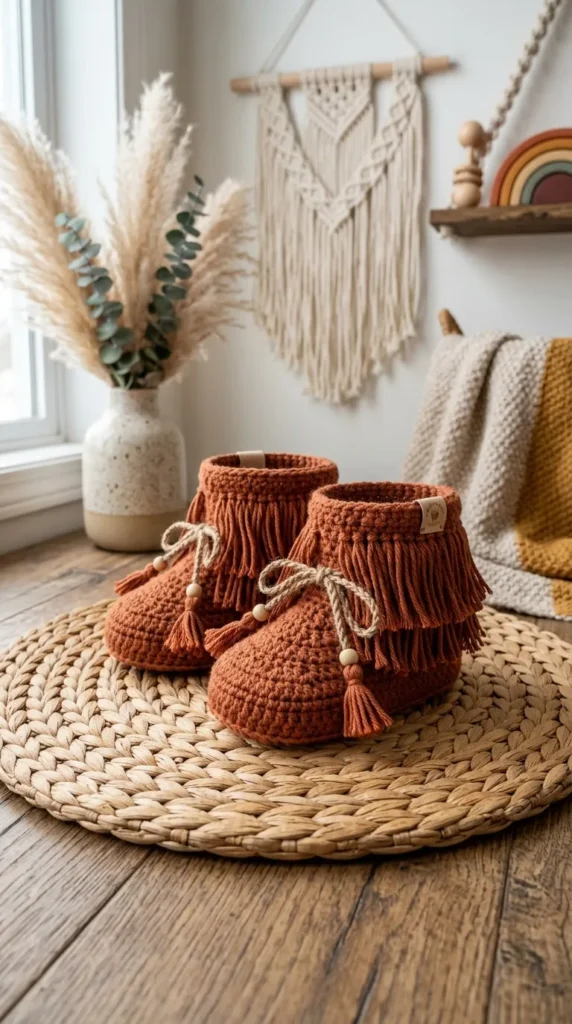
19. Bohemian Fringe Baby Booties

Brief Introduction

Trendy, free-spirited, and full of texture, Bohemian Fringe Baby Booties bring a stylish festival flair to infant footwear.

What This Idea Means

Combining classic moccasin-style bootie foundations with cascading fringe cuffs, these shoes offer a fun and fashionable statement piece for modern babies.

What is Needed to Make That Thing

  • Yarn: 1 skein of earthy worsted-weight yarn in rust, taupe, or mustard.
  • Hook Size: 3.5 mm (E-4) crochet hook.
  • Notions: Scissors and cardboard fringe template.

How to Make It

  1. Bootie Base: Crochet a sturdy sole and work upward to form the foot and ankle box.
  2. Fringe Collar: Cut multiple small strands of yarn and attach them using lark’s head knots around the ankle cuff.
  3. Trimming Fringe: Trim the fringe neatly with scissors so it hangs in an even, stylish line around the ankle.
  4. Sole Grip: Optional: apply puffy fabric paint dots on the bottom of the soles for non-slip traction if the baby is beginning to walk.
  5. Weaving Ends: Secure all interior tails to keep sensitive feet comfortable.

Tips and Variations

  • Tip: Comb through the fringe with a fine-toothed pet slicker brush if you prefer a fluffy, bohemian feathered look.
  • Variation: Add wooden beads to the ends of a decorative faux-leather lace tie around the ankle.

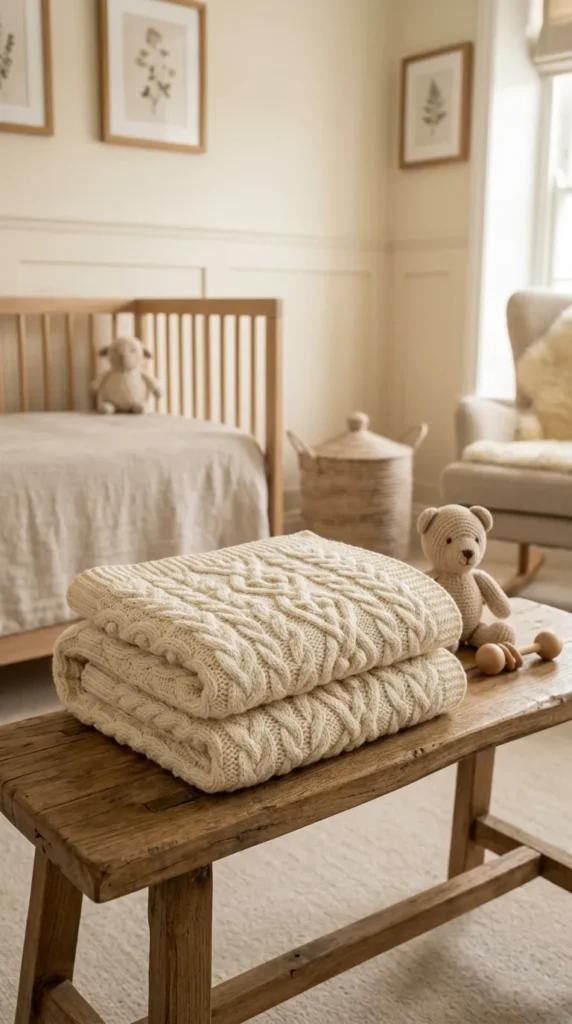
20. Classic Cabled Baby Blanket

Brief Introduction

Sophisticated and sculptural, the Classic Cabled Baby Blanket showcases intricate braided cable stitches that mimic high-end knitted Aran blankets.

What This Idea Means

Crochet cables create thick, raised structural braids that offer exceptional warmth, heavy drape, and breathtaking visual elegance for the nursery.

What is Needed to Make That Thing

  • Yarn: 5 to 6 skeins of premium merino wool or soft acrylic DK yarn.
  • Hook Size: 5.0 mm (H-8) crochet hook.
  • Notions: Cable needle (optional) and tapestry needle.

How to Make It

  1. Foundation Row: Chain a width that incorporates your cable panel stitch repeats plus border stitches.
  2. Working Cable Stitches: Use front post treble crochets skipped and crossed over each other to create the raised cable braid effect.
  3. Border Panels: Frame the central cable panels with simple moss stitch or ribbed borders.
  4. Growing the Blanket: Repeat your cable cross rows until the blanket reaches your desired length.
  5. Blocking: Block the finished blanket carefully to make the cable braids pop with crisp definition.

Tips and Variations

  • Tip: Cables are dense and heavy; choose a lightweight yarn like bamboo-wool blend to keep the blanket from becoming overly heavy for a baby.
  • Variation: Use a rich heathered gray or oat colorway for a gender-neutral modern heirloom look.

Conclusion

Creating handmade crochet items for babies is a wonderful way to pour love, patience, and creativity into physical form. Whether you decide to craft an heirloom christening gown, a playful woodland lovey, or a cozy cabled blanket, these 20 elegant ideas provide endless inspiration for your next crafting session. Grab your hook, select your favorite soft yarns, and start making memories one stitch at a time!

more ideas to come in future addition