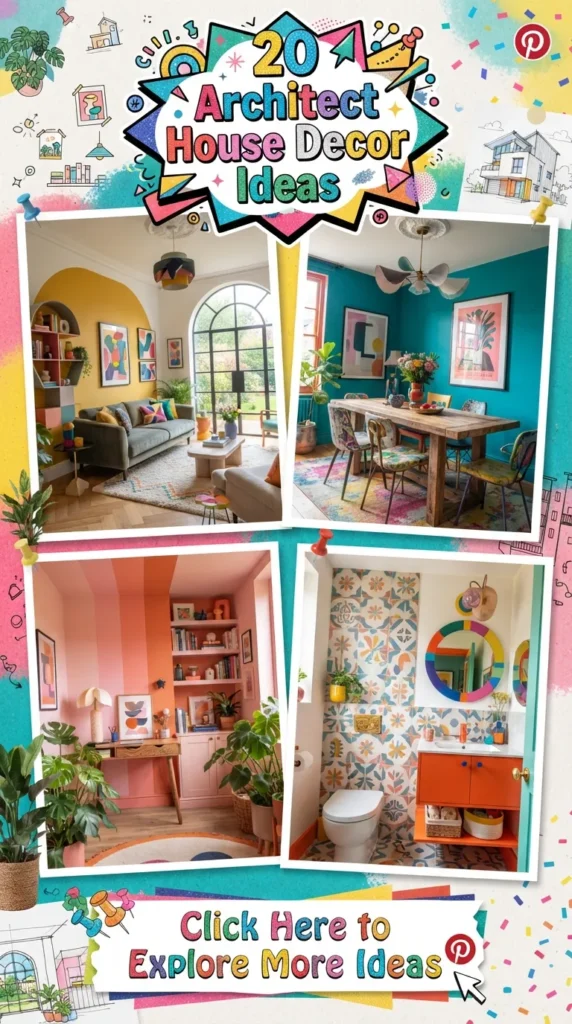
An architect-designed home is a masterclass in spatial choreography, structural honesty, and intentional minimalism. Unlike conventional residential interiors that rely on surface-level decoration, architect houses allow the architecture itself to dictate the decor. Raw materials such asboard-formed concrete, blackened steel, architectural glass, and warm timber take center stage, creating spaces that feel monumental yet deeply intimate.
Decorating an architect house requires a disciplined approach—balancing raw structural power with refined human comfort. Whether you are styling a modernist glass pavilion, a brutalist concrete sanctuary, or a contemporary timber-framed residence, this comprehensive guide explores 20 exquisite architect house decor ideas. Each concept includes a detailed introduction, an exploration of its design philosophy, step-by-step guidance on how to execute it, essential tips and variations, and the exact materials needed. At the conclusion of this article, you will find a curated collection of high-resolution visual prompts to inspire your next design project.
1. Exposed Concrete Structural Wall Feature
Introduction
Exposed concrete is the hallmark of modern brutalist and contemporary architecture. Leaving a structural concrete wall completely bare celebrates the raw integrity of the building process, showcasing aggregate textures, tie-rod holes, and natural formwork imperfections as high art.
What This Idea Means
This concept represents structural honesty and tactile permanence. It strips away artificial veneers to reveal the core skeletal strength of the home, introducing an earthy, monolithic coolness that anchors expansive rooms.
How to Make It
- Surface Preparation: Clean the raw concrete wall thoroughly using a specialized masonry cleaner to remove construction dust, efflorescence, and grease oils.
- Refining Imperfections: Fill major honeycombs or tie-rod holes with a matching concrete repair mortar, or leave them raw if you prefer authentic industrial texture.
- Sealing: Apply a matte, breathable penetrating concrete sealer to prevent dusting and moisture absorption while maintaining the natural, non-glossy finish.
- Lighting Enhancement: Mount a recessed architectural ceiling wash light or linear LED grazing strip directly above the wall to cast angled shadows across the concrete texture.
Tips and Variations
- Tip: Avoid high-gloss sealers; matte or satin finishes preserve the organic, stone-like aesthetic of architectural concrete.
- Variation: Acid-stain the concrete wall in a subtle warm greige or charcoal tone if the original pour is uneven in color.
Needs to Make That Thing
- Specialized masonry surface cleaner
- Concrete repair mortar and putty knife
- Matte penetrating concrete sealer and roller
- Recessed linear LED wall-grazing light fixture
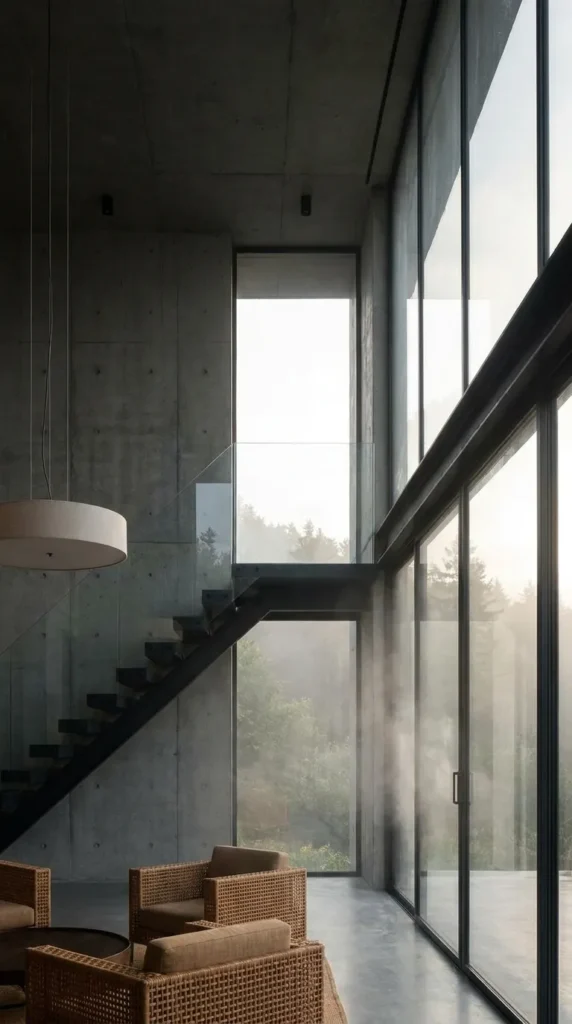
2. Minimalist Cantilevered Floating Staircase
Introduction
A cantilevered floating staircase is an engineering marvel that doubles as a sculptural work of art. With treads projecting directly from a hidden structural wall spine without visible vertical risers or bulky supports, it creates weightless vertical drama.
What This Idea Means
This design philosophy champions structural transparency and negative space. It allows light to filter freely between levels, making multi-story architect homes feel open and infinite.
How to Make It
- Engineering Sign-Off: Work with a structural engineer to install concealed heavy-duty steel plate stringers securely anchored into reinforced wall studs during framing.
- Tread Fabrication: Select thick, solid hardwood treads (such as white oak or walnut) or engineered stone slabs custom-fitted over the steel pin brackets.
- Balustrade Integration: Install frameless structural glass panels or minimalist vertical stainless steel cable tensioners alongside the staircase for safety without visual obstruction.
- Tread Lighting: Route recessed LED strip channels beneath the front nosing of each tread to illuminate the floating steps at night.
Tips and Variations
- Tip: Ensure non-slip finishing is applied to the top surface of wooden or stone treads if stairs are heavily trafficked in socks or bare feet.
- Variation: Pair raw blackened steel stringers with pale European white oak treads for a striking industrial-meets-warm-modern contrast.
Needs to Make That Thing
- Engineered concealed steel stair stringer brackets
- Thick solid hardwood or stone stair treads
- Frameless tempered safety glass balustrade panels
- Recessed LED stair strip lighting kit
3. Floor-to-Ceiling Structural Steel Window Wall
Introduction
Architect houses are defined by their dissolution of boundaries between indoor living and the landscape. Floor-to-ceiling structural steel-framed window walls flood the interior with natural light and frame outdoor views like living masterpieces.
What This Idea Means
This concept focuses on biophilic immersion and seamless spatial continuity. It turns the changing weather, seasons, and garden foliage into the primary visual decoration of the room.
How to Make It
- Structural Load Calculation: Ensure your steel moment frames are engineered to bear roof loads while accommodating expansive multi-pane glass modules.
- Frame Installation: Install thermally broken steel window profiles finished in durable matte black or dark bronze powder coat.
- Glazing Selection: Fit double or triple-paned low-E architectural glass units to maximize thermal efficiency and acoustic dampening.
- Minimalist Hardware: Choose ultra-slim flush handles and concealed locking mechanisms that maintain clean sightlines across the window grid.
Tips and Variations
- Tip: Keep interior window sills completely free of clutter to emphasize the clean geometric grid lines of the steel frames.
- Variation: Incorporate corner-opening sliding glass pocket doors where two glass walls meet without a corner column.
Needs to Make That Thing
- Architectural steel window framing profiles and moment joints
- Low-E insulated architectural glass panels
- Heavy-duty silicone structural glazing sealant
- Matte black minimalist door and window hardware
4. Board-Formed Concrete Fireplace Surround
Introduction
Board-formed concrete combines the industrial strength of concrete with the rich organic grain texture of wooden planks pressed into the wet mix during casting. A floor-to-ceiling board-formed concrete fireplace acts as a monumental hearth anchor.
What This Idea Means
This design celebrates tactile duality—the marriage of hard stone with soft organic wood grain. It introduces rich linear texture and monumental focal weight to modern living spaces.
How to Make It
- Building the Formwork: Construct custom wooden formwork boxes using rough-sawn southern yellow pine or cedar planks to capture deep grain patterns.
- Pouring and Vibrating: Pour self-consolidating concrete into the formwork, vibrating the exterior to eliminate air pockets against the wooden boards.
- Curing and Stripping: Allow the concrete to cure for 7 days before stripping away the wooden formwork to reveal the embossed wood grain texture.
- Mounting and Sealing: Install the heavy concrete panels securely around the firebox, sealing them with a flat matte protective coating.
Tips and Variations
- Tip: Experiment with varying board widths in your wooden formwork to create a more dynamic, randomized linear wood-grain pattern on the concrete surface.
- Variation: Cast a minimalist cantilevered concrete hearth bench extending from the base of the fireplace surround.
Needs to Make That Thing
- Rough-sawn timber planks for formwork construction
- High-strength concrete mix and concrete vibrator
- Heavy-duty lifting equipment and mounting brackets
- Matte breathable concrete sealer
5. Integrated Linear Slot Diffuser Lighting
Introduction
In an architect-designed home, mechanical and electrical services are treated as integrated architecture rather than afterthoughts. Recessed linear slot diffusers and shadowline lighting eliminate bulky surface vents and fixtures for a pristine ceiling plane.
What This Idea Means
This concept champions architectural purity and visual minimalism. It ensures that ceilings remain uncluttered planes of light and shadow without intrusive hardware.
How to Make It
- Drywall Integration: Collaborate with your HVAC and electrical contractors during framing to install flush-mount plaster-in linear diffuser channels and light tracks.
- Finishing Plasterwork: Taper drywall mud seamlessly right up to the razor-thin metal edges of the linear slots, ensuring zero visible trim flanges.
- Installing LED Tracks: Snap high-output, low-voltage LED light modules or adjustable spotlights directly into the recessed architectural channels.
- Zoning Controls: Connect linear lighting runs to smart multi-zone dimming systems to adjust ambient and task lighting effortlessly.
Tips and Variations
- Tip: Choose 2700K warm white LED modules to maintain an inviting residential warmth against stark architectural surfaces.
- Variation: Extend linear light slots continuously from the ceiling down the wall for a striking architectural portal effect.
Needs to Make That Thing
- Plaster-in architectural linear light channels and HVAC slots
- Low-voltage LED light strips and drivers
- Drywall finishing mud, tape, and corner beads
- Smart lighting dimmer control system
6. Double-Height Open-Plan Mezzanine Balcony
Introduction
Maximizing vertical volume is a cornerstone of modern residential architecture. A double-height open-plan living area paired with an overlooking mezzanine balcony creates breathtaking spatial drama and multi-level connectivity.
What This Idea Means
This design philosophy explores vertical architecture and volumetric grandeur. It allows occupants to experience intimacy and openness simultaneously within the same home envelope.
How to Make It
- Structural Floor Opening: Design a floor cutout leaving a double-height void over the main living zone, reinforced with structural steel perimeter headers.
- Mezzanine Edge Railing: Install a minimal glass balustrade or vertical metal slat railing along the mezzanine edge to maintain unobstructed views downward.
- Acoustic Management: Balance the hard reflective surfaces of double-height ceilings and concrete floors by incorporating large acoustic wool area rugs and upholstered furnishings.
- Vertical Articulation: Hang an oversized sculptural pendant chandelier from the roof peak down through the double-height void.
Tips and Variations
- Tip: Position a tall library bookshelf on the mezzanine level that spans both floors, accessible via a rolling architectural ladder.
- Variation: Use perforated metal mesh panels for the mezzanine guardrail to allow light filtration between upper and lower levels.
Needs to Make That Thing
- Structural steel floor framing headers and support joists
- Frameless glass or vertical steel slat balustrade
- Oversized vertical pendant lighting fixture
- Acoustic wool area rugs and soft furnishings
7. Bespoke Monolithic Poured Terrazzo Flooring
Introduction
Terrazzo—a composite material consisting of chips of marble, quartz, granite, and glass poured seamlessly with a cementitious or polymeric binder—offers a luxurious, unbroken monolithic floor surface.
What This Idea Means
This concept celebrates seamless surface continuity and customized color composition. Terrazzo floors eliminate grout lines, creating a vast, smooth canvas that unifies open-plan spaces.
How to Make It
- Subfloor Preparation: Ensure your concrete subfloor slab is completely level, dry, and free of cracks to prevent shifting in the poured terrazzo.
- Divider Strip Layout: Install slender brass or zinc divider strips in geometric patterns across the floor to control curing and create elegant design inlays.
- Pouring and Troweling: Pour the custom aggregate and binder mix onsite, troweling it flat and rolling it to compact the embedded stone chips.
- Grinding and Polishing: Once cured, grind the surface smooth with industrial diamond polishers through progressive grits, finishing with a penetrating sealer.
Tips and Variations
- Tip: Choose a fine marble aggregate mixed into a warm white or light gray cement base for a sophisticated, understated Scandinavian aesthetic.
- Variation: Extend the poured terrazzo seamlessly up vertical walls to create matching monolithic baseboards or shower surrounds.
Needs to Make That Thing
- Terrazzo binder resin or cement and custom stone aggregate chips
- Brass or zinc architectural divider strips
- Industrial diamond floor grinding and polishing machinery
- Penetrating terrazzo surface sealer


8. Custom Blackened Steel Architectural Room Divider
Introduction
Dividing open-plan architect spaces without blocking natural light requires architectural screens. A custom floor-to-ceiling blackened steel room divider introduces crisp industrial geometry and functional zoning.
What This Idea Means
This design highlights metallic structure and permeable spatial zoning. It creates intimate functional rooms (like a home office or reading lounge) within a sprawling open floor plan.
How to Make It
- Design and Engineering: Sketch a geometric grid layout (such as Mondrian-inspired asymmetric rectangles) matching your ceiling height and floor dimensions.
- Steel Fabrication: Have a metal fabricator weld heavy-duty hot-rolled steel tubing together, treating the frame with a traditional chemical blackening patination process.
- Wax Protection: Apply a micro-crystalline paste wax to the blackened steel surface to lock in the rich dark patina and prevent oxidation.
- Anchoring: Bolt the steel room divider securely into the floor slab and ceiling joists using concealed mounting plates.
Tips and Variations
- Tip: Alternate solid steel panels with open glass or reeded glass inserts within the grid to vary privacy levels across the divider.
- Variation: Design the steel divider as a pivoting wall system that can swing open to completely merge two rooms.
Needs to Make That Thing
- Hot-rolled structural steel tubing and flat bars
- Chemical blackening metal patination solution
- Micro-crystalline protective paste wax
- Heavy-duty floor and ceiling anchor brackets
9. Flush-Mounted Minimalist Shadowline Baseboards
Introduction
Traditional protruding baseboards collect dust and disrupt clean wall planes. Flush-mounted minimalist shadowline baseboards (or reveal baseboards) sit entirely flush with the drywall, creating a sleek recessed shadow gap at the floor.
What This Idea Means
This concept represents meticulous detailing and seamless architectural precision. It eliminates visual clutter, allowing walls to appear as if they float slightly above the finished floor.
How to Make It
- Installing Reveal Trims: During framing and drywall hanging, install specialized aluminum shadowline trim beads (often called “J-beads” or reveal moldings) around the base of all walls.
- Drywall Tapering: Mud and tape the drywall right up to the edge of the aluminum reveal extrusion, creating a crisp 1/2-inch recessed gap above the floor.
- Flooring Installation: Install your hardwood or tile flooring so it butts neatly underneath the shadow gap without touching the upper wall board.
- Painting: Paint the recessed reveal channel in a contrasting matte black or match the wall color for a continuous floating wall effect.
Tips and Variations
- Tip: Ensure absolute floor leveling before installing reveal beads so the shadowline gap remains perfectly uniform around the entire room.
- Variation: Embed linear LED strip lighting inside the shadow gap baseboard channel for a glowing floating-wall nocturnal effect.
Needs to Make That Thing
- Aluminum shadowline drywall reveal trims (J-beads)
- Drywall joint compound, tape, and corner tools
- Flooring material (hardwood, tile, or micro-cement)
- Matte interior paint for reveal channels
10. Pocket-Door Indoor-Outdoor Glass Wall Transition
Introduction
Eliminating the barrier between interior living and the backyard patio is a hallmark of modern architecture. Pocket glass doors slide effortlessly into wall cavities, making the entire exterior wall vanish.
What This Idea Means
This design philosophy celebrates ultimate environmental integration. It creates a continuous indoor-outdoor living pavilion where interior lounges flow directly onto outdoor pool decks.
How to Make It
- Structural Header & Pocket Cavity: Engineer a heavy steel header to support overhead loads while constructing double-walled pocket cavities within the side framing.
- Flush Track Installation: Recess the bottom sliding door tracks flush into the finished floor so there is zero threshold lip to trip over when walking outside.
- Multi-Panel Glass Sliders: Install large-format insulated glass sliding panels equipped with smooth heavy-duty roller bearings and multi-point locking hardware.
- Drainage Integration: Install linear slot drains directly outside the glass threshold to catch rainwater and prevent pooling against the track.
Tips and Variations
- Tip: Align your indoor and outdoor flooring materials (such as large-format interior and exterior porcelain tiles) to enhance the illusion of a continuous floor plane.
- Variation: Install motorized automatic sliding pocket doors operated by wall switches or smart home automation systems.
Needs to Make That Thing
- Architectural pocket-door sliding glass wall system
- Heavy-duty structural steel overhead support header
- Flush-recessed floor tracks and linear exterior drain
- Multi-point locking architectural handles
11. Reclaimed Timber Structural Truss Accentuation
Introduction
In timber-framed or vaulted architect houses, structural roof trusses are often exposed. Cleaning, treating, and accentuating these massive wooden structural triangles adds monumental warmth and rustic pedigree.
What This Idea Means
This concept honors historic craftsmanship, timber engineering, and biophilic grandeur. It draws the eye upward, celebrating the raw skeletal roof support of the home.
How to Make It
- Restoration and Cleaning: Sand blast or hand-scrape old structural timber trusses to remove old finishes, dust, and surface discoloration while keeping hand-hewn marks intact.
- Treatment: Apply a non-yellowing matte timber oil or borate-based wood preservative to protect the wood and highlight rich grain depth.
- Uplighting: Mount directional architectural spotlight fixtures onto neighboring walls or structural posts, aiming beams upward to illuminate the truss geometry.
- Hardware Detailing: Expose and polish heavy forged iron bolts, gusset plates, and steel tie rods connecting the wooden truss joints.
Tips and Variations
- Tip: Use a soft-bristle attachment on a vacuum annually to keep dust from settling on the upper horizontal members of high timber trusses.
- Variation: Hang a massive minimalist iron chandelier from the central king post of the primary timber truss.
Needs to Make That Thing
- Timber sanding blocks and hand scrapers
- Matte penetrating wood oil or clear preservative
- Directional wall-mounted architectural spotlights
- Forged iron structural bolt covers and tie rods
12. Architectural Concrete Kitchen Island Monolith
Introduction
The kitchen island in an architect house is treated as a piece of functional sculpture. A monolithic kitchen island cast entirely from smooth architectural concrete or wrapped in seamless quartz creates an imposing, indestructible focal point.
What This Idea Means
This design focuses on monolithic mass and tactile utility. It provides a heavy, permanent anchor for the kitchen, resisting trends with timeless brutalist elegance.
How to Make It
- Design and Formwork: Build an exact wooden formwork shell for the island base, countertops, and waterfall side panels, accounting for sink and cooktop cutouts.
- Pouring High-Performance Concrete: Pour glass-fiber reinforced concrete (GFRC) or self-consolidating mix into the molds, ensuring smooth vibration against the form faces.
- Curing and Polishing: Cure the concrete for 14 days, demold carefully, grind the surface to expose fine stone aggregates, and apply a food-safe stain-proof sealer.
- Appliance Integration: Flush-mount induction cooktops and undermount sinks seamlessly into the concrete slab surface.
Tips and Variations
- Tip: Apply a high-performance penetrating food-safe sealer to prevent citrus juice or red wine from etching or staining the concrete surface.
- Variation: Combine a concrete island base with a contrasting cantilevered solid walnut breakfast bar extension.
Needs to Make That Thing
- Glass-fiber reinforced concrete (GFRC) mix or quartz slabs
- Custom wooden casting formwork materials
- Wet diamond polishing pads and chemical sealers
- Flush-mount kitchen appliances and undermount sink
13. Recessed Wall Slot Art Display Gallery Lighting
Introduction
Architect houses often function as personal art galleries. Installing continuous recessed wall slots with adjustable art gallery track lighting allows you to illuminate paintings and sculptures with museum-grade precision.
What This Idea Means
This concept represents curated sophistication and precise optical engineering. It eliminates harsh overhead glare, bathing artwork in targeted, flattering illumination.
How to Make It
- Recessed Track Planning: Route continuous recessed drywall track housings into the ceiling joists parallel to your primary art walls during framing.
- Installing Track Fixtures: Insert miniature magnetic LED track heads or zoomable framing projectors that allow you to shape light beams precisely to the dimensions of each canvas.
- Adjusting Color Temperature: Set track lights to 3000K high-CRI (Color Rendering Index) bulbs to ensure true, vibrant representation of art pigments.
- Curating the Wall: Hang large-scale contemporary artworks along the wall grazed by the recessed lighting track.
Tips and Variations
- Tip: Use optical framing projectors to project a crisp rectangular beam of light that matches the exact shape of your painting, making the canvas appear to glow from within.
- Variation: Combine art track lighting with vertical LED grazing uplights embedded in the floor beneath large sculptures.
Needs to Make That Thing
- Recessed ceiling lighting tracks and housings
- Miniature magnetic LED track spotlight fixtures
- High-CRI (95+) LED bulbs (3000K)
- Framing projector lenses for beam shaping
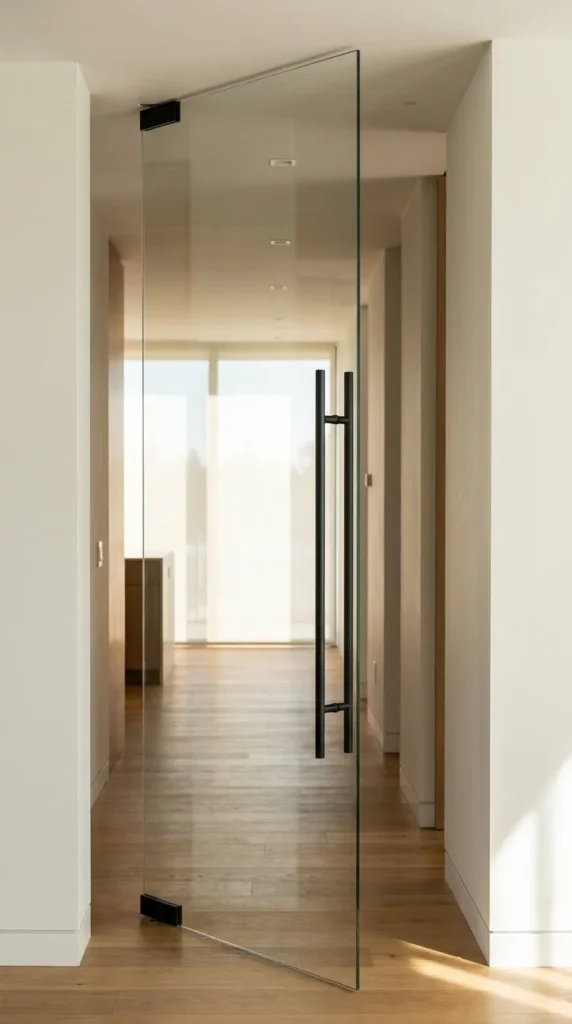
14. Frameless Interior Glass Pivot Doors
Introduction
Traditional hinged doors with standard jambs disrupt clean architectural lines. Frameless interior glass pivot doors rotate on concealed top and bottom floor-to-ceiling pins, offering effortless, silent movement and ultra-modern style.
What This Idea Means
This design champions smooth kinetic motion and invisible thresholds. It allows oversized, heavy doors to swing effortlessly while maximizing light transmission between rooms.
How to Make It
- Structural Pivot Placement: Install heavy-duty concealed floor and ceiling pivot hinges capable of supporting heavy glass or massive wooden door panels.
- Glass Fabrication: Order custom 1/2-inch thick tempered or laminated safety glass panels cut precisely to your pivot clearance dimensions.
- Floor Recessing: Recess the bottom pivot floor box flush into the subfloor before final flooring installation.
- Minimalist Hardware: Attach a slender matte black or brushed brass vertical pull handle to complete the pivot door assembly.
Tips and Variations
- Tip: Pivot doors can swing 360 degrees or stop at 90 degrees depending on how you set the internal hinge limiters.
- Variation: Use smoked bronze tinted glass for a moody, sophisticated entryway pivot door into a master suite.
Needs to Make That Thing
- Concealed heavy-duty floor and ceiling pivot hinge sets
- Custom 1/2-inch tempered safety glass door panels
- Slender vertical architectural door pull handles
- Floor box recessing and mounting hardware


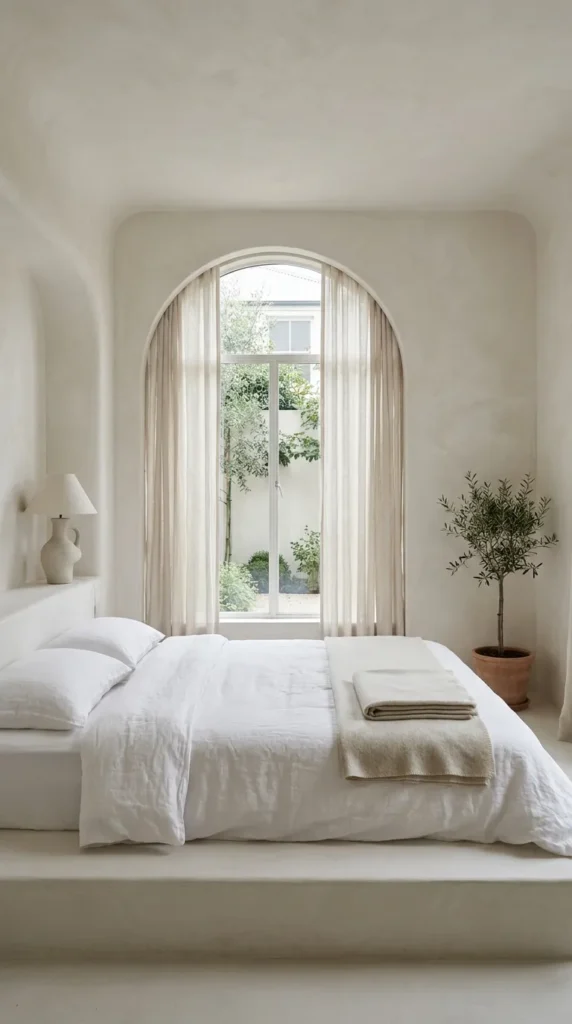
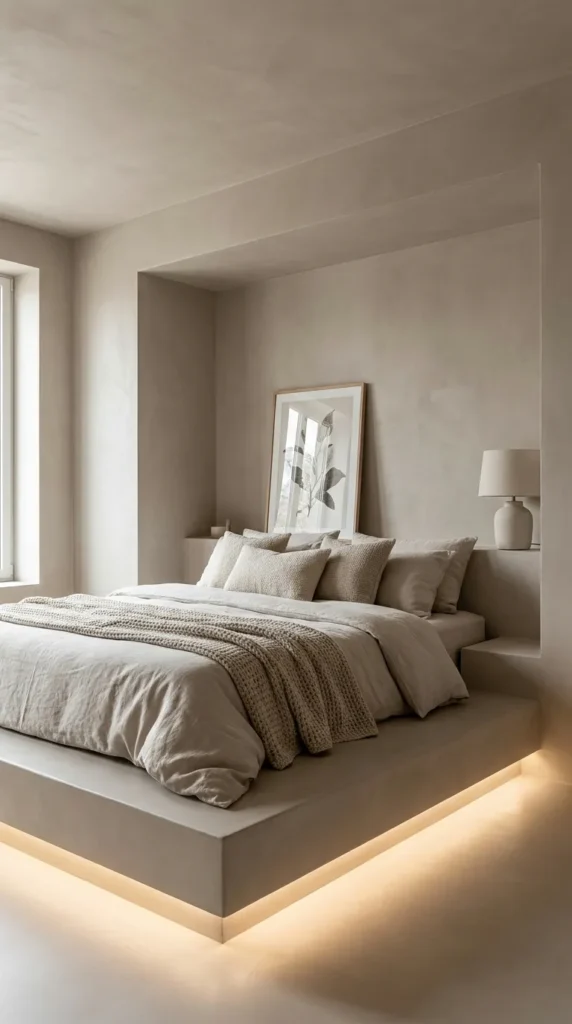
15. Built-In Micro-Cement Platform Bed Niche
Introduction
Built-in furniture is a hallmark of architectural interior design. Constructing a custom micro-cement platform bed nestled inside a recessed wall niche creates a minimalist, hotel-inspired minimalist sleeping sanctuary.
What This Idea Means
This concept prioritizes built-in permanence and seamless integration. It eliminates the need for bulky store-bought bed frames, anchoring the bedroom around a sleek monolithic platform.
How to Make It
- Framing the Platform: Build a sturdy structural timber platform anchored securely into the floor and wall studs of a recessed bedroom alcove.
- Applying Backer Board: Cover the wooden platform framework with cement backer board, screwing all joints flush.
- Micro-Cement Application: Trowel multiple coats of seamless micro-cement plaster over the entire platform, headboard wall, and surrounding niche.
- Sealing and Buffing: Sand the cured micro-cement smooth and apply a protective matte polyurethane sealer for a velvety, stone-like tactile finish.
Tips and Variations
- Tip: Integrate warm LED strip lighting recessed beneath the floating overhang of the micro-cement bed platform for a glowing nightlight effect.
- Variation: Build matching built-in micro-cement floating nightstands flanking either side of the platform bed.
Needs to Make That Thing
- Structural timber framing and cement backer board
- Micro-cement plaster kit (base coat, finish coat, pigment)
- Steel trowels and fine sanding blocks
- Matte protective polyurethane sealer
16. Perforated Metal Screen Privacy Balustrade
Introduction
In urban architect houses where privacy from neighboring properties is essential, replacing solid solid walls with custom laser-cut perforated metal screens allows light and breeze through while blocking unwanted lines of sight.
What This Idea Means
This design philosophy balances privacy with porous permeability. It introduces intricate geometric shadow patterns into the home as sunlight filters through the metal perforations.
How to Make It
- Pattern Design: Choose a geometric or organic laser-cut perforation pattern (such as Voronoi diagrams, minimalist dots, or brutalist grids) with a 40% open area ratio.
- Fabrication: Have metal fabricators cut and brake-form thick aluminum or weathering steel sheets to fit your balcony or window screen frames.
- Powder Coating: Finish the perforated panels in a durable exterior-grade matte black or dark bronze powder coat to resist corrosion.
- Secure Mounting: Bolt the perforated screens firmly into structural steel perimeter framing or masonry anchors.
Tips and Variations
- Tip: When interior lights are turned on at night, perforated screens cast stunning lace-like shadow patterns across your indoor walls and floors.
- Variation: Use weathering weathering steel (COR-TEN) for screens that develop a rich, stable orange-brown rust patina over time.
Needs to Make That Thing
- Custom laser-cut perforated metal panels (aluminum or steel)
- Exterior-grade powder coating finish
- Structural mounting frames and stainless steel fasteners
- Masonry anchors (if mounting to concrete)
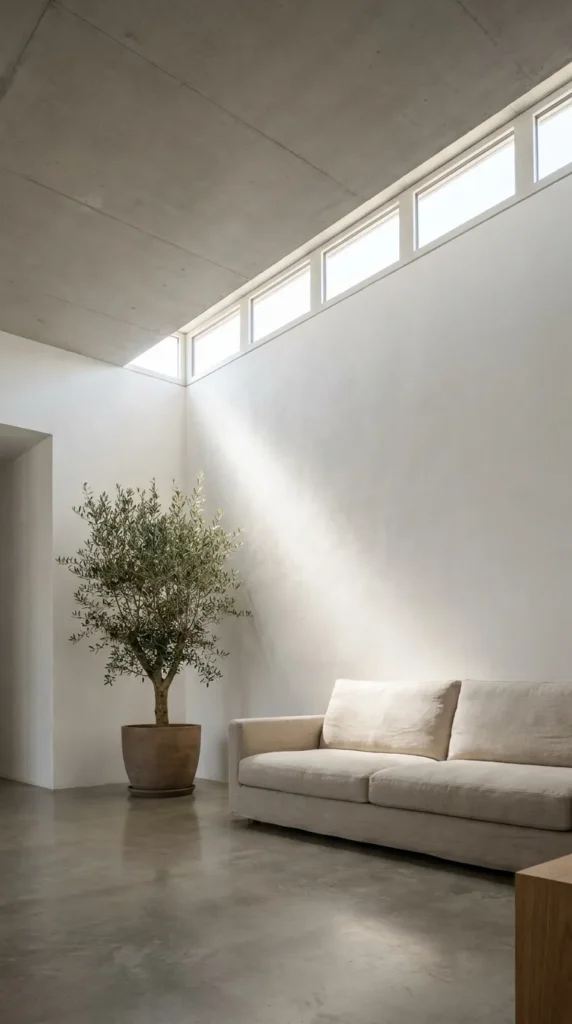
17. Strategic Clerestory Window Light Wells
Introduction
Clerestory windows—high-level horizontal windows positioned just beneath the roofline—allow daylight to wash deep into the core of an architect house without compromising privacy from neighbors.
What This Idea Means
This concept celebrates sky-directed daylighting and volumetric lightness. It creates the optical illusion that the heavy roof is floating weightlessly above the walls on a cushion of natural light.
How to Make It
- Roof Framing Adjustment: Collaborate with an architect to frame high horizontal window openings into the upper wall plates during roof construction.
- Angled Light Splayed Jambs: Construct interior window jambs at an outward-splayed angle to bounce and diffuse incoming sunlight deeper into the room.
- Concealed Motorized Blinds: Install automated roller blinds hidden within recessed ceiling pockets if light control is required for sleeping areas.
- Glass Selection: Use high-performance solar-control low-E glass to prevent overheating from high-angle direct overhead sun exposure.
Tips and Variations
- Tip: Paint the splayed interior window jambs in pure matte white to maximize light reflection into the space.
- Variation: Wrap clerestory windows continuously around all four walls of a living room to create a 360-degree floating roof halo effect.
Needs to Make That Thing
- High-level horizontal clerestory window framing units
- Splayed drywall or wood window jamb construction
- Motorized recessed roller shade system
- Solar-control insulated architectural glass
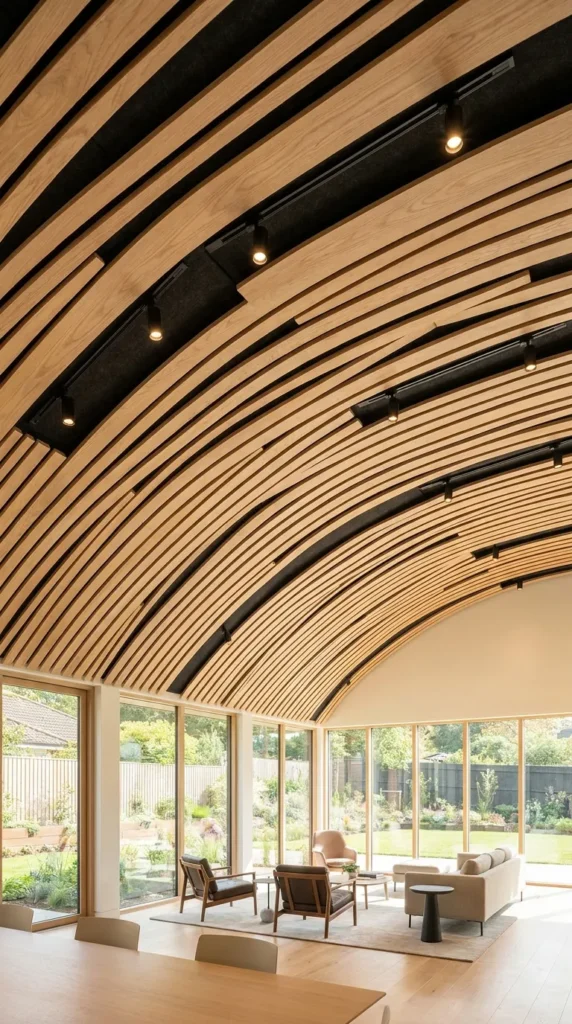
18. Architectural Slatted Hardwood Ceiling Panels
Introduction
Vaulted or flat ceilings in architect homes can sometimes feel acoustically harsh or visually sterile. Installing linear architectural slatted hardwood ceiling panels introduces rich linear rhythm, warmth, and superior sound absorption.
What This Idea Means
This design emphasizes linear rhythm and acoustic softening. It wraps the room in warm timber grain, turning the ceiling into a sophisticated textural canopy.
How to Make It
- Acoustic Backing Preparation: Install black acoustic felt backing rolls across the ceiling joists to absorb sound waves and conceal raw wiring.
- Installing Slatted Panels: Fasten prefabricated acoustic wood slat panels (crafted from white oak or black walnut) directly onto the felt and joists using hidden clip fasteners.
- Edge Trimming: Finish perimeter wall junctions with clean shadowline reveals or matching wooden trim pieces.
- Integrated Lighting: Recess miniature black spotlight fixtures directly between the wooden slats for seamless integration.
Tips and Variations
- Tip: Ensure wood slats are finished with a clear UV-resistant matte varnish to prevent natural timber from darkening or yellowing over time.
- Variation: Continue the slatted wood ceiling panels down one accent wall to create a dramatic wrapping portal effect.
Needs to Make That Thing
- Prefabricated acoustic wood slat ceiling panels (Oak or Walnut)
- Black acoustic felt backing material
- Hidden clip fasteners and mounting screws
- Recessed miniature black spotlight fixtures
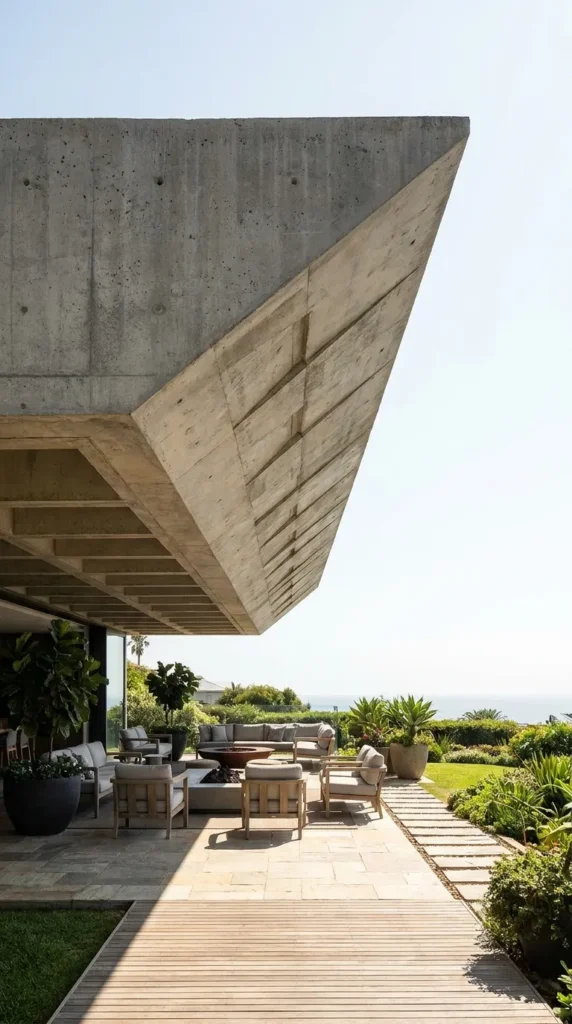
19. Cantilevered Outdoor Concrete Patio Overhang
Introduction
Architectural drama extends beyond interior walls. A massive cantilevered concrete patio roof overhang extends outward over an outdoor lounge terrace without visible supporting posts, defying gravity with brutalist elegance.
What This Idea Means
This concept represents structural daring and sheltered outdoor living. It creates a shaded exterior architectural room that protects against sun and rain while maintaining unobstructed views.
How to Make It
- Engineered Cantilever: Require rigorous structural engineering involving heavy internal steel reinforcement bars anchored deep back into the primary building foundation.
- Formwork and Pouring: Construct heavy-duty shoring and wooden formwork to cast the thick cantilevered concrete slab monolithically with the roof structure.
- Integrated Drainage: Cast concealed internal drainage pipes within the concrete overhang to channel rainwater away cleanly without dripping onto the patio below.
- Outdoor Ceiling Finish: Smooth and seal the underside of the concrete overhang, installing flush-mount weatherproof outdoor recessed lights.
Tips and Variations
- Tip: Pair the cantilevered concrete overhang with heated outdoor ceiling radiant panels to extend your patio usability into chilly autumn evenings.
- Variation: Install recessed linear wood slat panels underneath the concrete overhang for a warm textural contrast against the raw concrete.
Needs to Make That Thing
- Heavy-duty steel structural reinforcement cage
- Concrete formwork shores and high-strength concrete mix
- Concealed internal roof drainage piping
- Weatherproof IP65 outdoor recessed LED lights
20. Monochromatic Plaster-Wash Minimalist Walls
Introduction
To unify an architect house where diverse raw materials (concrete, steel, glass, wood) meet, enveloping walls in a monochromatic plaster-wash finish creates a calming, chalky, museum-grade backdrop.
What This Idea Means
This design philosophy celebrates unified minimalism and tactile breathability. It replaces flat latex paint with a living mineral finish that softens light and breathes character into spaces.
How to Make It
- Surface Smoothing: Skim-coat drywall walls smooth to level 5 finish standards to ensure a flawless canvas.
- Applying Mineral Plaster: Trowel natural lime or clay plaster across the walls in sweeping, organic arcs using a Japanese steel trowel.
- Burnishing: Lightly burnish the plaster surface with the trowel as it sets to develop a subtle, cloud-like sheen and velvety touch.
- Protective Sealing: Seal the mineral plaster with a breathable matte soap or wax coating to protect against scuffs while preserving vapor permeability.
Tips and Variations
- Tip: Keep the color palette strictly monochromatic—shades of warm bone, alabaster, or soft greige—so the focus remains entirely on architectural form and light.
- Variation: Apply the same plaster finish over electrical outlet covers and wall vents so they disappear completely into the monolithic wall plane.
Needs to Make That Thing
- Natural lime or clay mineral plaster mix
- Japanese steel plastering trowels and hawk
- Fine-grit sanding sponges
- Matte breathable protective soap or wax sealer


