As the leaves turn golden, crisp air settles in, and the world begins to slow down, it’s the perfect time to lean into autumn’s charm with something handmade. For adults looking to embrace the fall season with style, vintage‐inspired craft projects provide both a creative outlet and timeless décor. Whether you have a cozy nook to style, a mantel to dress, or simply want a relaxing craft afternoon, these easy DIYs offer both aesthetic appeal and approachable execution.
Many of the ideas draw on classic materials and nostalgic touches—think worn book pages, burlap, weathered wood, soft metallics—and yet they’re easy enough to complete in an afternoon. According to craft bloggers, fall craft ideas are not just for kids—they’re a lovely way for adults to get cozy, creative, and craft something meaningful for the home.
Below are ten vintage‐easy fall craft ideas, each with a step‐by‐step overview and styling tips, followed by a matching image prompt to inspire a beautiful visual for Pinterest or Instagram.
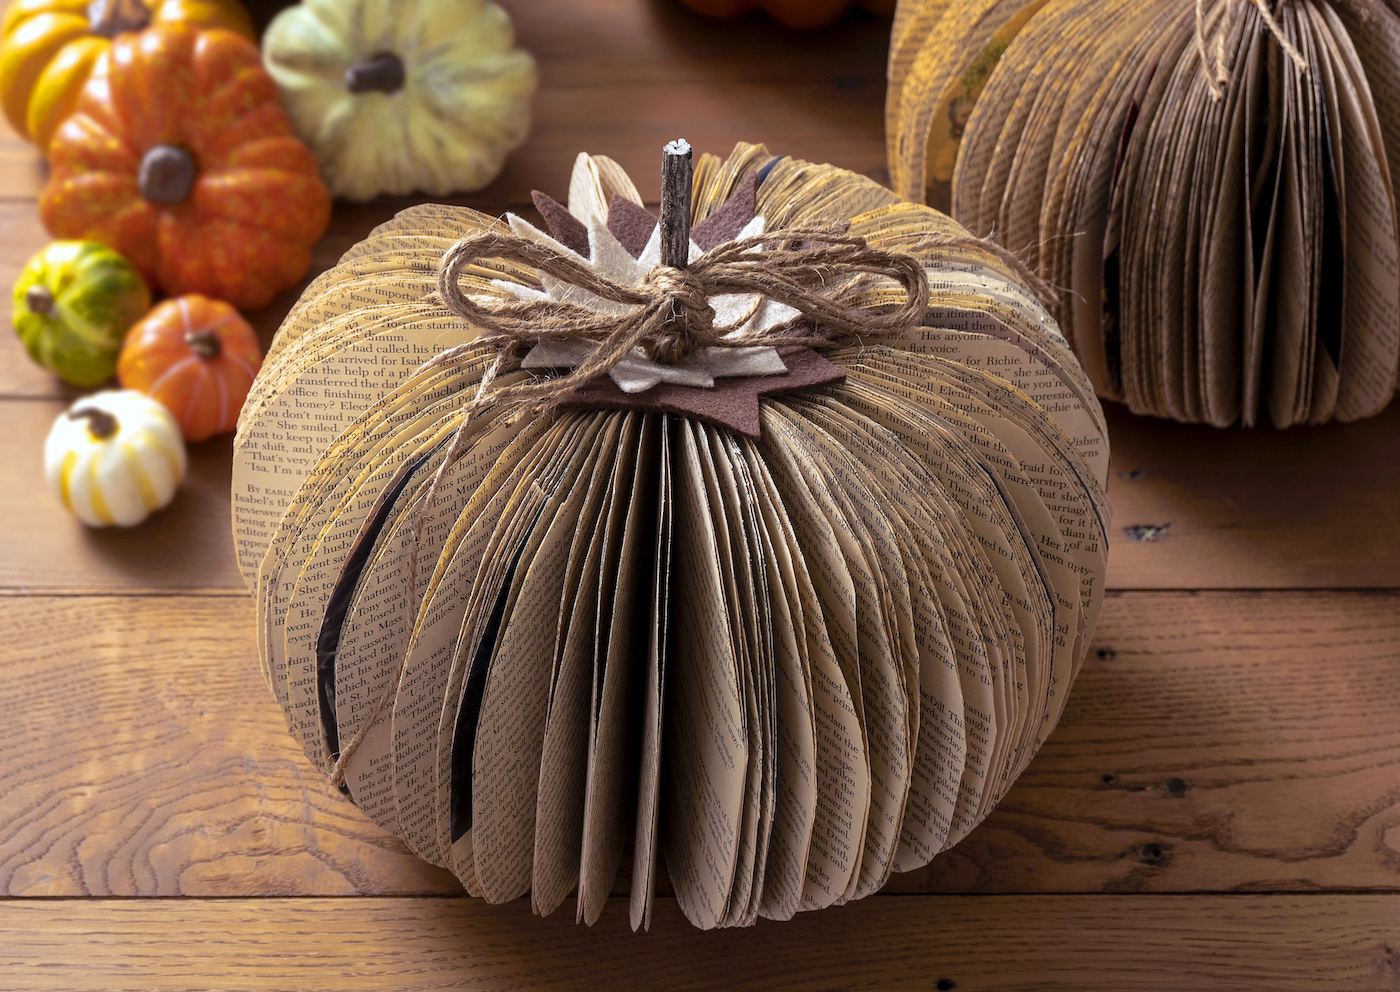
1. Vintage Book Page Pumpkin
Why it works: Upcycling old books or surplus pages gives you a nostalgic, literary aesthetic while crafting something seasonal. The weathered look of printed pages adds vintage charm. (You’ll find variations of this referenced in vintage‐inspired fall craft round-ups.) emilyretro.com
What you’ll need: Old book (or loose book pages), glue (mod-podge style), scissors, spray paint or metallic accent (optional), faux or real pumpkin form (or create one from papier mâché).
How to do it:

- If using a real pumpkin, clean the surface and let it dry; if using a faux form, ensure it’s primed.
- Tear or cut the book pages into strips or small pieces—varying sizes lend texture.
- Apply glue to the pumpkin, then layer the book page pieces, smoothing them down. Continue until the form is fully covered (or cover most of it, leaving some “bare” spots for a distressed look).
- Once dry, optionally spray lightly with gold or bronze metallic for highlights, or distress the edges of the pages with sandpaper for a worn look.
- Seal with a clear matte spray if needed.
Styling tip: Display on a mantel with vintage book stacks, brass candleholders, and a garland of dried leaves for full nostalgic fall charm.


5
2. Burlap & Lace Pumpkin Trio
Why it works: Burlap gives rustic texture, lace adds a vintage feminine touch. Paired together, these materials evoke worn-elegant, farmhouse-chic fall décor.
What you’ll need: Small to medium faux pumpkins (or real ones), burlap fabric or ribbon, lace trims, twine, hot glue, optional faux pearls or buttons.
How to do it:

- Wrap each pumpkin with burlap, securing with hot glue or fabric glue.
- Add a strip of lace around the middle or the base of the stem.
- Use twine to mimic pumpkin ridges (wrap from top to bottom in sections) and tie at the top for a stem accent.
- Embellish with a pearl or vintage button at the front if desired.
Styling tip: Arrange three pumpkins of varying sizes on a wooden tray, alongside a small mercury‐glass votive candle for a gentle glow.


6
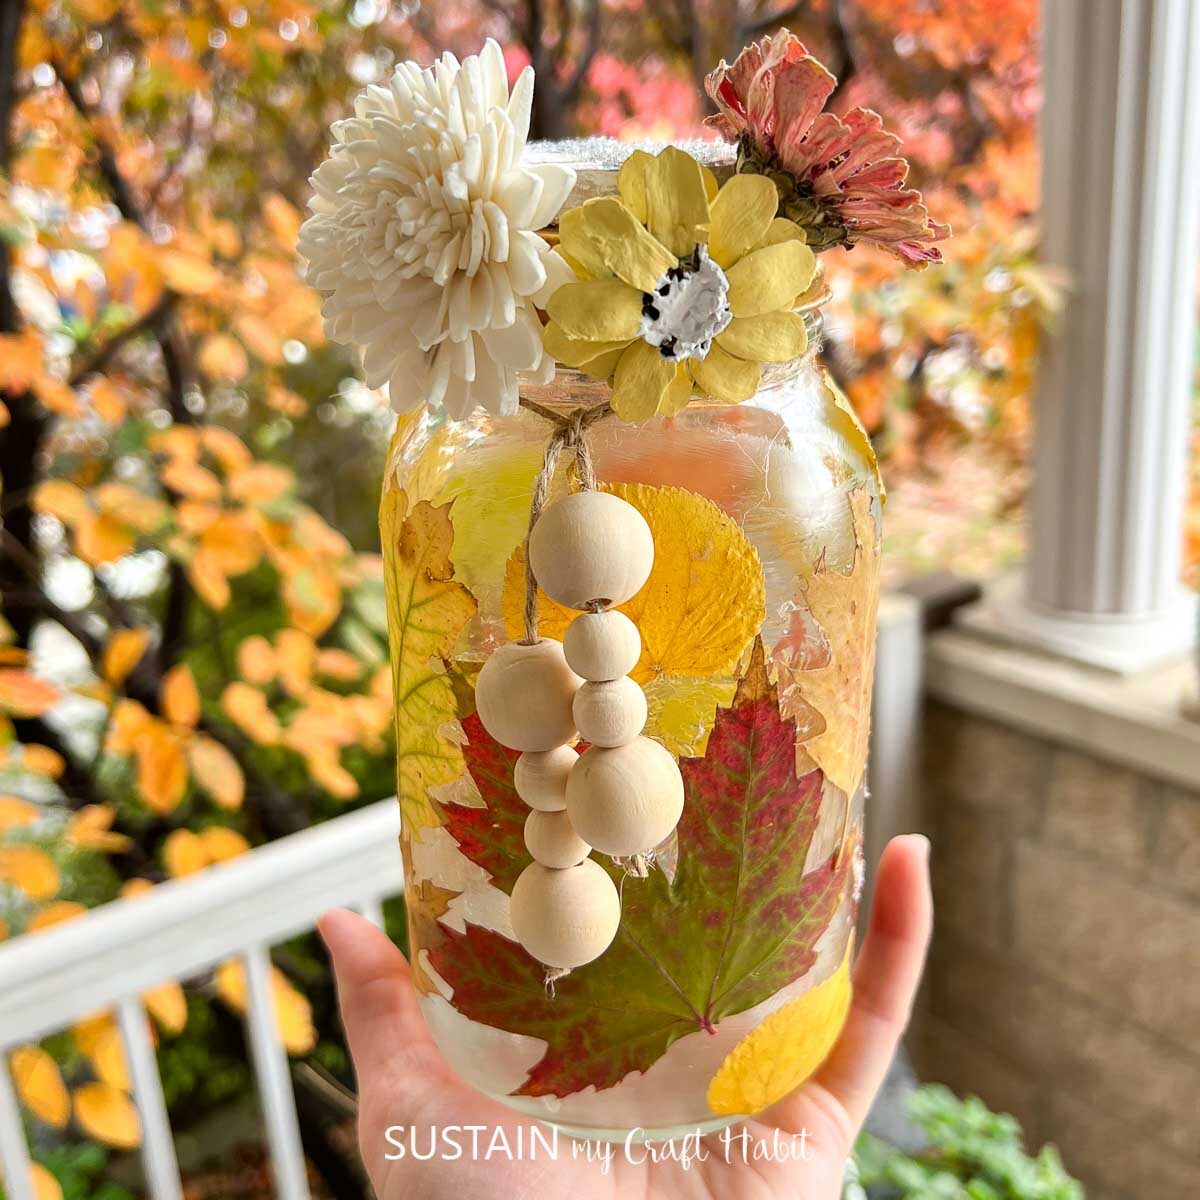
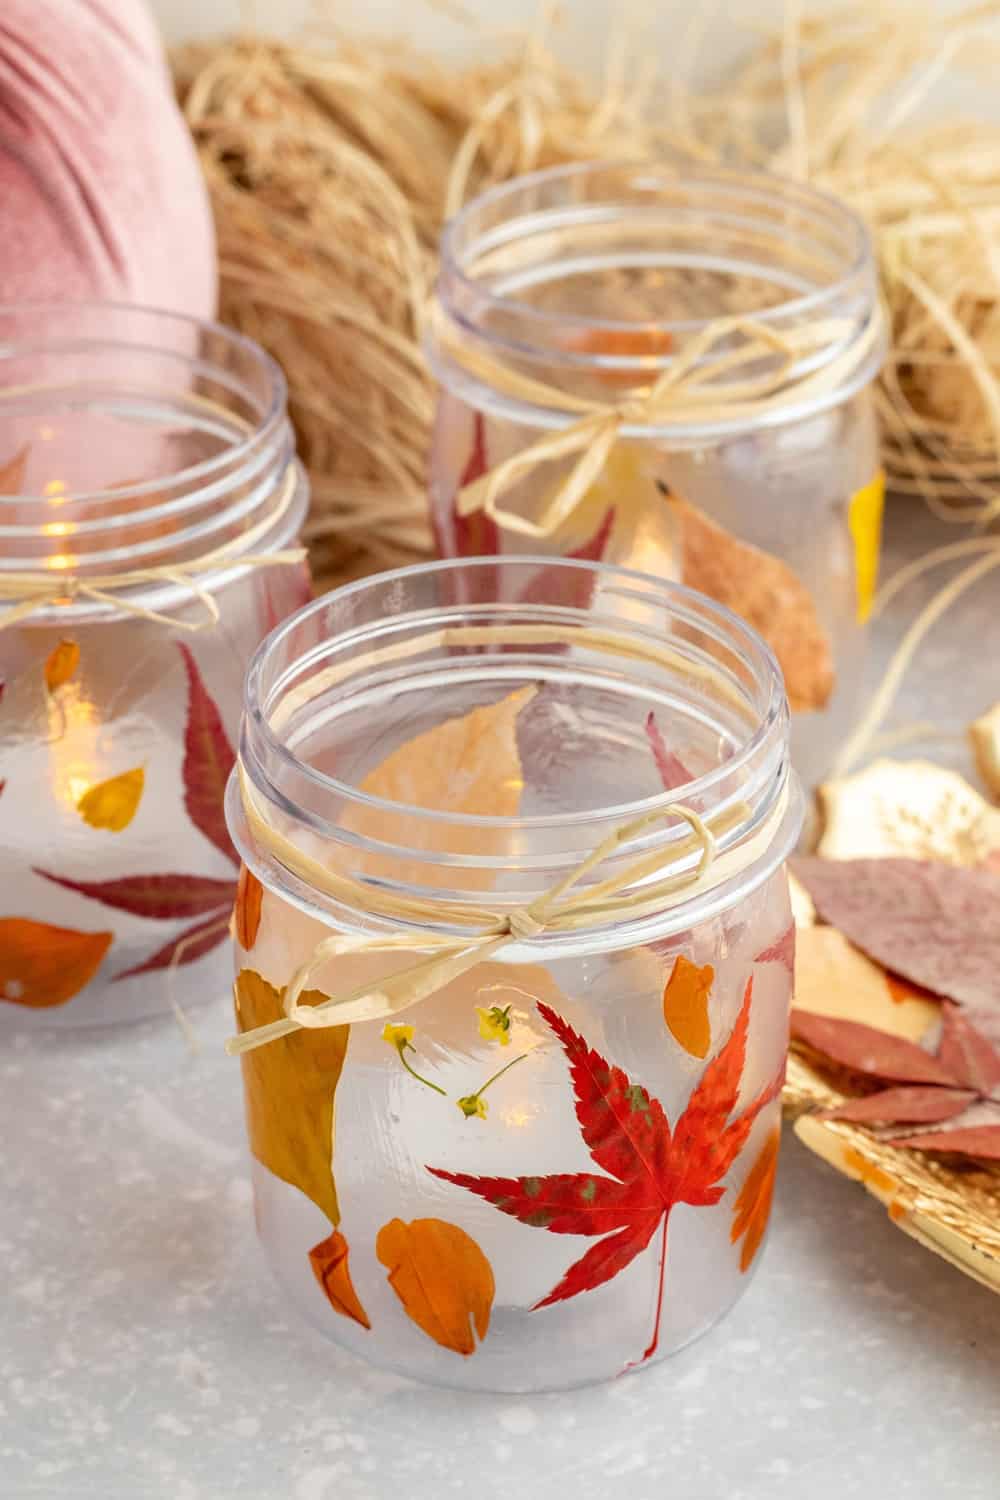
3. Pressed Leaf Luminary Jar
Why it works: Collecting leaves, pressing them, and using them in decor connects you to nature—and the translucent effect of leaves on glass creates soft, ambient lighting. Vintage jars or apothecary bottles add character.
What you’ll need: Mason jars or vintage glass jars, battery tea lights, assorted fall leaves (pressed or flattened), mod-podge or clear craft glue, sponge brush, optional twine or ribbon.
How to do it:

- Press leaves in a heavy book for 1–2 days so they lie flat.
- Clean the jar surface.
- Apply a thin layer of mod-podge or glue to the jar’s exterior.
- Position the pressed leaves on the jar, smoothing out any air bubbles.
- Apply another thin layer of glue over the leaves to seal them. Let dry.
- Tie a piece of twine or ribbon around the jar’s neck for extra charm.
- Place a battery tea light inside and set on a mantel or side table.
Styling tip: Pair with other jars of varied sizes, some with twine-wrapped stems, some plain, for an eclectic vintage grouping.

6
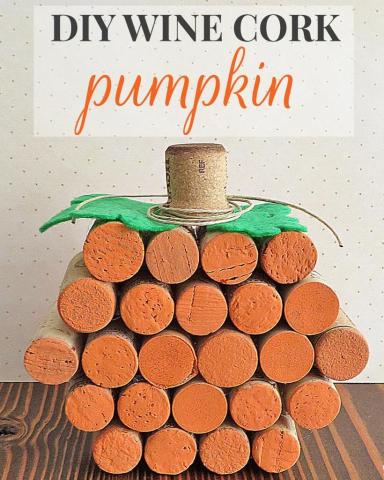
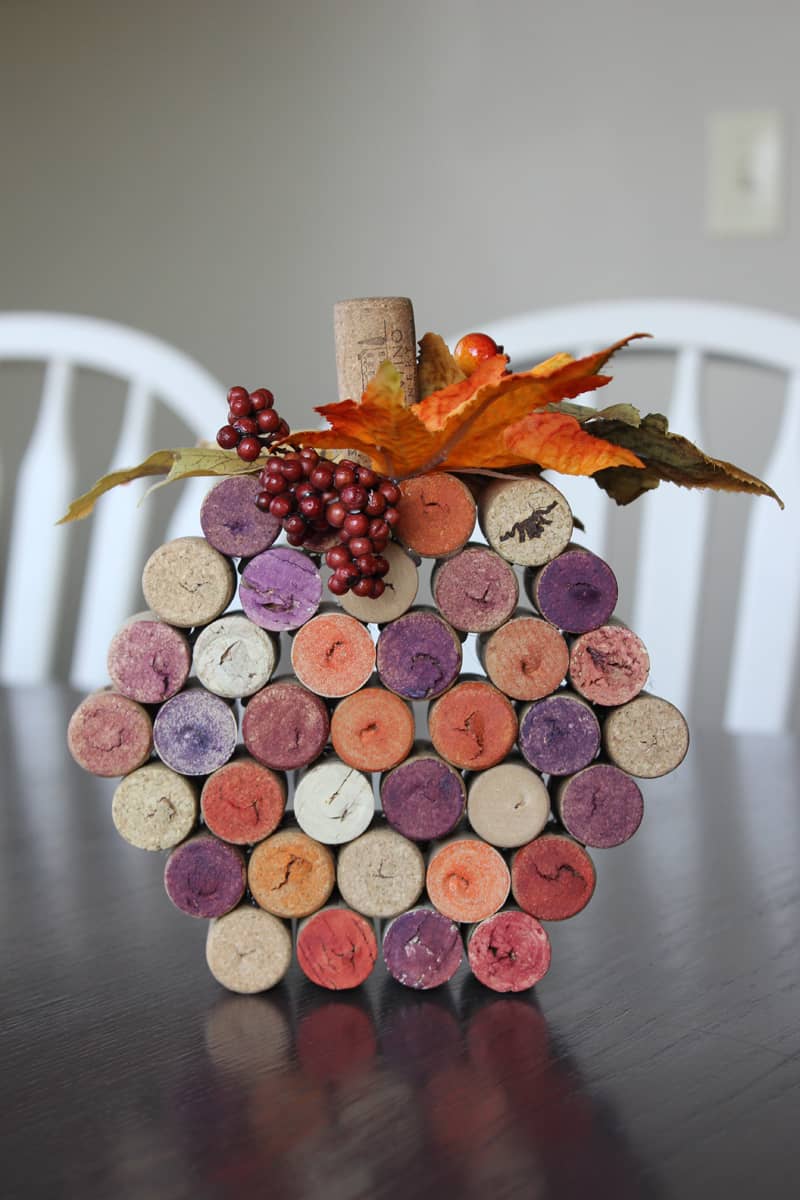
4. Upcycled Wine Cork Pumpkins
Why it works: Wine corks repurposed into mini pumpkins are clever, eco-friendly, and perfect for a grown-up craft. The texture of cork pairs well with aged wood and metal accents for a vintage feel.
What you’ll need: Several wine corks (approx. 5-8 per pumpkin), glue gun, small slice of wooden disc or round base, twig or cinnamon stick for stem, optional paint/accent.
How to do it:

- Arrange corks vertically in a circle on the wooden base, forming a pumpkin shape. Use hot glue to secure them.
- Place a twig or cinnamon stick in the center as the stem, glue it in place.
- Optionally, paint the corks in muted fall tones (mustard, rust, olive) or leave natural for a rustic look.
- For extra texture, lightly sand some cork edges or add metal charms.
Styling tip: Create a trio of cork pumpkins and place them in a shallow wooden bowl or on a tray with dried wheat stems for a vintage harvest centerpiece.

6

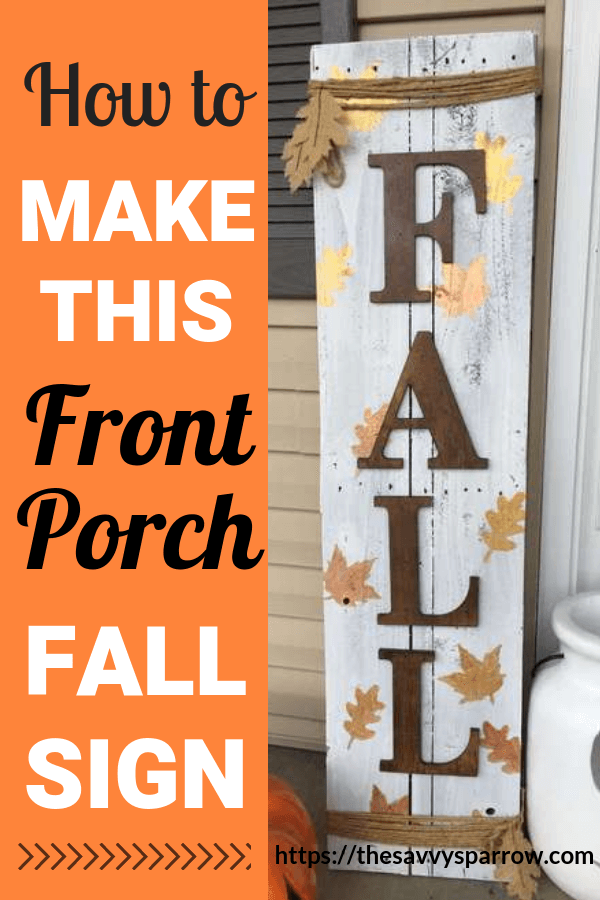
5. Distressed Wood Fall Sign
Why it works: A wood sign with a warm autumn phrase (like “Hello Fall” or “Gather”) painted and distressed evokes old-farmhouse charm. It’s something you’ll want out all season. Lovely Indeed+1
What you’ll need: Rough-sawn wooden board or pallet slat, sandpaper, chalk paint or milk paint (in muted tones like cream, sage, rust), stencil or vinyl lettering, wax or glaze for aging.
How to do it:

- Sand the board lightly and wipe away dust.
- Paint the board in base color; let dry.
- Apply stencilled text in contrasting color.
- Lightly sand edges and corners to reveal wood beneath, creating a distressed look.
- Optional: apply brown glaze or wax to recesses for age.
Styling tip: Hang on a textured wall (brick or shiplap), lean on a mantel behind grouped votives and books.


6
6. Vintage Sheet Music Leaf Wreath
Why it works: Old sheet music (or vintage book pages) repurposed into leaf shapes creates a wreath that softly references autumn’s golden tones. The musical element adds a nostalgic touch.
What you’ll need: Sheet music pages (old or printed with vintage font), craft wire wreath form, hot glue, paint wash (optional, in sepia or gold), ribbon for hanging.
How to do it:

- Cut sheet music into leaf shapes (various sizes).
- If desired, brush a light wash of gold or sepia paint over the leaves and let dry.
- Starting at one spot on the wreath form, glue leaves in overlapping layers around the form.
- Once fully covered, add a ribbon loop at the top for hanging.
Styling tip: Hang on the inside of a front door or above a side table with a small stack of vintage books and a brass candleholder.


6
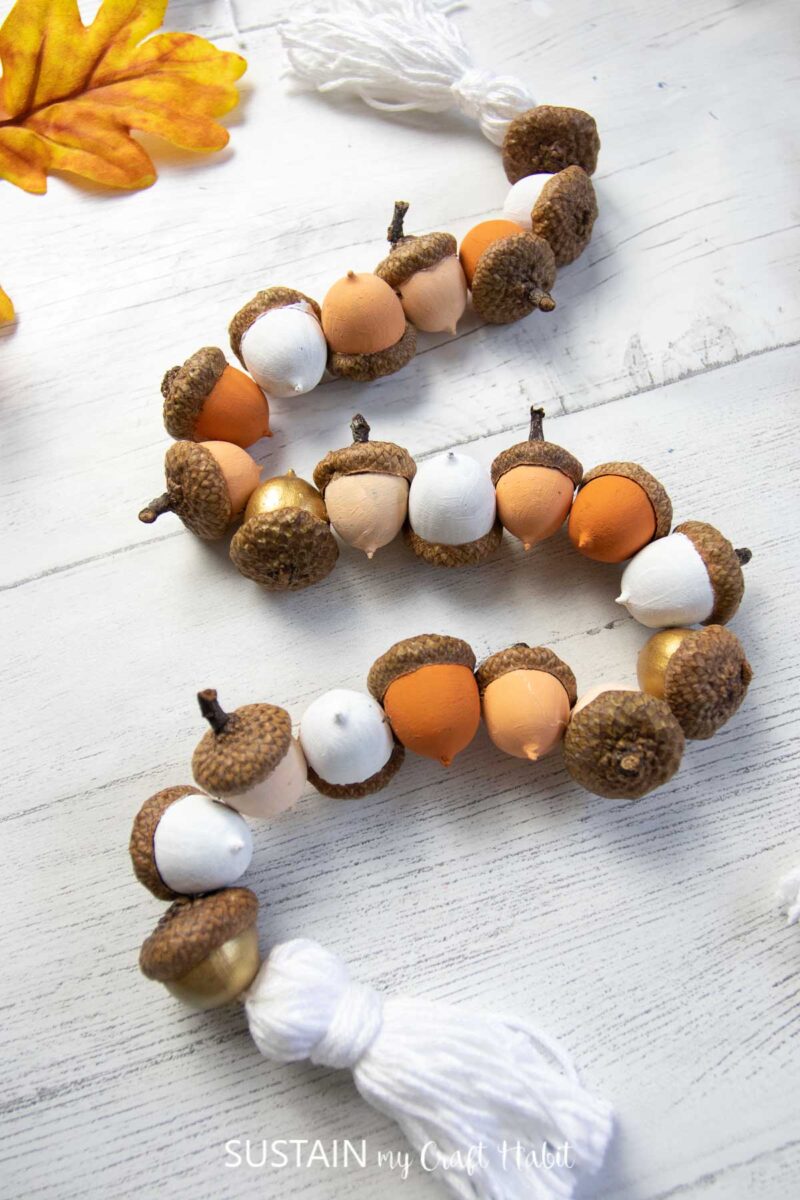
7. Antique Book Page Garland with Acorns
Why it works: Combining wrinkled or yellowed book pages with real or faux acorns gives you an earthy, old-world aesthetic. The garland format is versatile and space-friendly.
What you’ll need: Book pages (or newsprint like vintage look), acorns (gathered or faux), twine or jute rope, glue, scissors.
How to do it:

- Cut book pages into squares or rectangles of varying size.
- Fold or roll each piece to create mini “flags” and glue to twine every 4-6 inches.
- Between paper flags, glue acorns or small clusters of acorns for texture.
- Hang across a mantel, over windows, or along shelving.
Styling tip: The garland pairs beautifully with string lights and old glass bottles for vintage ambience.


6
8. Rustic Chalk-Painted Pumpkin Planter
Why it works: Chalk paint gives faux pumpkins (or even real ones) an elegant, muted finish—perfect for a vintage palette rather than bright orange. Use as planters to add natural fall accents.
What you’ll need: Faux foam pumpkin or real pumpkin, chalk paint (cream, sage, soft grey), sandpaper, optional faux plant or dried flowers.
How to do it:

- Paint the pumpkin with chalk paint; allow to dry.
- Lightly sand edges and ridges for distressing.
- Cut out top if using as a planter; add faux plant or dried florals.
Styling tip: Place the planter on a side table with aged metal tray underneath to catch any crumbs or dried bits, for that vintage curated feel.


6
9. Fabric Acorns in Twine Basket
Why it works: Fabric acorns made from cotton or linen scraps look charming and handmade. Display in a wire or woven basket for that collected-over-time look.
What you’ll need: Fabric scraps (neutral tones), acorn cap bits (real or faux), stuffing (cotton or polyfill), twine, small basket, hot glue.
How to do it:

- Cut fabric into circles (approx. 3–4″ wide), place stuffing in center, gather edges and wrap tightly with twine to form the acorn body.
- Glue the acorn cap to the top of each fabric body.
- Make a dozen or so and arrange loosely in a basket.
Styling tip: Pair with a small vintage brass scoop or old ledger book for an authentic “found at a flea market” harvest feel.


6
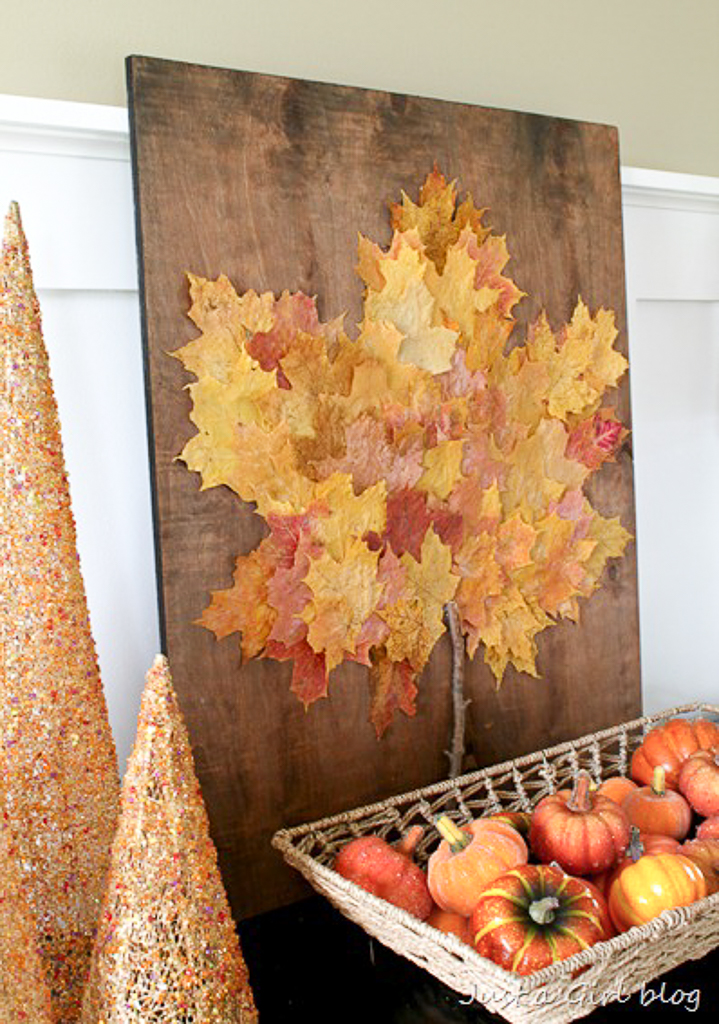
10. Vintage Map Leaf Wall Art
Why it works: Using old maps (or map‐print paper) to cut leaf shapes and frame them creates a travel‐meets‐harvest piece of art. The map’s patina adds vintage flair while the leaf motif evokes fall.
What you’ll need: Old map or map‐print paper, scissors, glue, backing board or canvas, simple frame (rustic wood or metal), optional gold leaf accent.
How to do it:

- Cut leaf shapes from the map paper (vary shapes & sizes).
- Arrange leaves on your backing board/canvas in a loose cluster or pattern; glue down.
- If desired, add a thin gold‐leaf edge to each leaf or highlight parts of the map with metallic ink.
- Frame and hang.
Styling tip: Mount the art above a vintage sideboard and flank with an old globe or brass candlestick for a cohesive vintage travel/fall décor corner.


6
Closing Thoughts
Autumn invites slowing down, gathering, and creating. These ten vintage‐easy fall crafts for adults are perfect for bringing warmth, character, and handcrafted charm into your space. They don’t require advanced skills or expensive tools—frequently you’ll find yourself using materials you already have (old books, burlap scraps, wine corks, etc.). And when the finished pieces go into your living room, entryway, or on your shelf, they tell a story of hands‐on creativity and personal style.
Take an afternoon, brew your favourite autumn tea (or pumpkin-spiced latte), put on cozy music, and let yourself craft. You’ll end up with pieces you’ll enjoy all season long—and perhaps pass along as thoughtful handmade gifts.
Happy crafting, and here’s to a beautiful, vintage-inspired fall!