Beaded bracelets are the quintessential accessory for showcasing personal style, mixing textures, and creating effortless everyday stacks. Whether you lean toward delicate pastel pearls, bohemian gemstone wraps, edgy metallic hardware, or playful vintage glass, handcrafting your own bracelets allows you to tailor every design to your exact aesthetic.
Upcycling vintage beads, incorporating raw natural crystals, and experimenting with various cord weaving techniques can turn simple materials into boutique-quality jewelry. Below is a comprehensive guide featuring 20 Aesthetic & Inspiring Easy DIY Beaded Bracelet Ideas, complete with detailed breakdowns of each concept, step-by-step tutorials, crafting tips, design variations, and material checklists.


1. Pastel Pearl & Glass Seed Bead Daisy Chain Bracelet
What This Idea Means
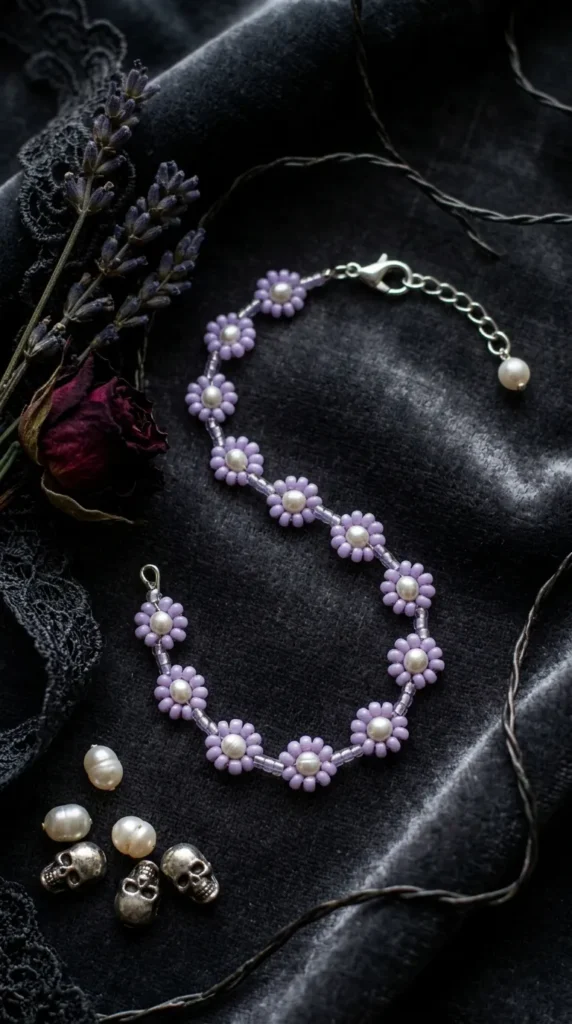
The classic retro daisy chain gets a sophisticated, soft makeover by pairing delicate pastel glass seed beads with tiny faux pearls for the flower centers. This lightweight, whimsical bracelet brings a vintage cottagecore touch to any bracelet stack.
How to Make It
- Prepare Beading Thread: Cut a 24-inch piece of flexible nylon beading thread and attach a size 10 beading needle to one end.
- String Base Beads: Thread 4 pastel seed beads (e.g., soft lavender or blush pink) to form the outer petals.
- Add Center Pearl: Thread 1 tiny 3mm pearl bead to serve as the flower center.
- Form the Daisy: Loop the needle back down through the very first seed bead strung. Add 3 more pastel seed beads and pull the thread through the bead directly opposite the first loop to form a full circular flower.
- Repeat Pattern: String 3 neutral background seed beads (such as cream or clear silver-lined glass), then repeat the daisy pattern until the bracelet reaches your desired length (approx. 6.5–7 inches).
- Finish Ends: Crimp tiny wire guards onto both thread ends and secure a small gold lobster claw clasp with jump rings.
Tips & Variations
- Tip: Keep consistent thread tension; pulling too tightly will cause the daisy chain to curl rather than lie flat against your wrist.
- Variation: Swap pastel colors for vibrant rainbow seed beads set against black accent beads for a bold 90s nostalgiac look.
What You Need
- Size 11/0 glass seed beads (Pastel shades)
- 3mm faux or freshwater pearl beads
- Size 10 beading needle & nylon beading thread
- Crimp beads, wire guards, jump rings, & lobster clasp
- Fine detail scissors & jewelry pliers
2. Minimalist Gold Bead & Raw Gemstone Stacking Bracelet
What This Idea Means
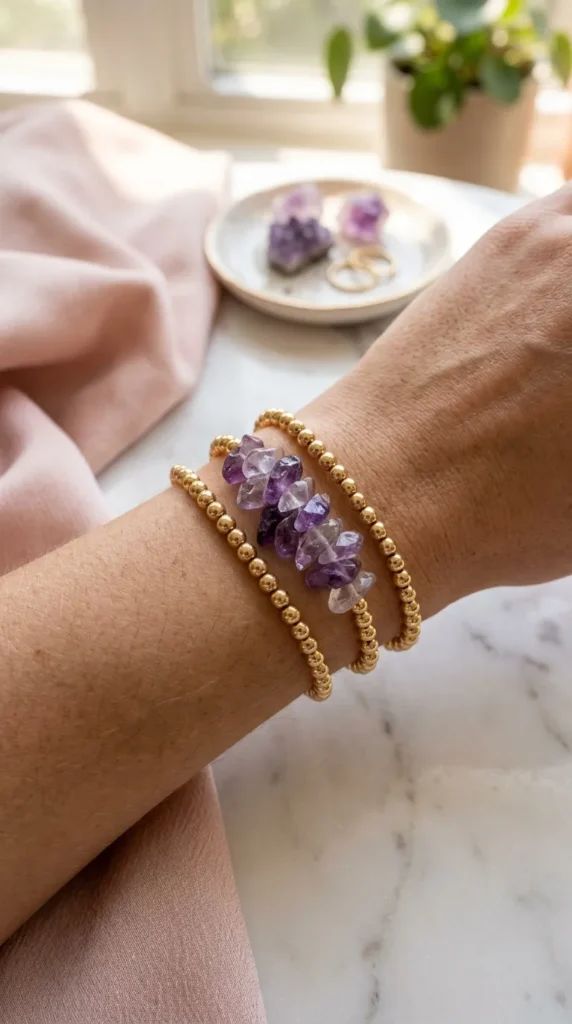
Sleek, modern, and effortless, this minimalist bracelet pairs smooth, polished 14k gold-filled beads with a central accent of rough, uncut gemstone chip beads (like amethyst, aquamarine, or citrine). It offers an elevated everyday look that layers seamlessly with watches or bangles.
How to Make It
- Cut Elastic Cord: Cut an 8-inch piece of high-durability 0.7mm stretch elastic cord (like Stretch Magic). Pre-stretch the cord by gently pulling both ends.
- Pattern Assembly: Thread polished 3mm gold-filled beads onto the cord until you reach halfway across the wrist length.
- Add Focal Gemstones: String a cluster of 5 to 7 raw gemstone chip beads in the center of the strand.
- Complete the Ring: Continue stringing gold-filled beads until the bracelet matches your wrist circumference.
- Knot securely: Tie a surgeon’s knot (double overhand knot with an extra loop). Apply a tiny drop of clear jewelry glue to the knot, let it dry for 1 minute, and slide the knot inside the hole of an adjacent gold bead to hide it.
Tips & Variations
- Tip: Pre-stretching the elastic cord before stringing prevents your finished bracelet from sagging or stretching out over time.
- Variation: Alternate 3 gold beads and 1 smooth gemstone bead continuously across the entire bracelet for a uniform pattern.
What You Need
- 3mm gold-filled or brass smooth round beads
- Raw natural gemstone chip beads (Amethyst, Rose Quartz, Jade)
- 0.7mm clear stretch elastic cord
- G-S Hypo Cement or clear jewelry glue
- Bead stopper or painter’s tape & sharp scissors
3. Bohemian Multi-Wrap Leather & Crystal Bead Bracelet
What This Idea Means
Inspired by artisan boutique jewelry, this wrap bracelet coils 2 to 3 times around the wrist. It features faceted glass crystal beads nestled neatly between two parallel strands of soft leather cord, secured with decorative ladder stitching.
How to Make It
- Prep the Leather Frame: Cut a 36-inch piece of 1.5mm round leather cord. Fold it in half to form a loop at the top (sized to fit your closure button) and tie an overhand knot. Clamp the loop to a clipboard.
- Thread the Needle: Cut 4 feet of strong fireline beading thread. Tie it to the left leather strand just below the top knot.
- Begin Ladder Stitch: Thread 1 faceted 4mm glass crystal bead onto your needle. Pass the needle over the right leather strand, under it, back through the crystal bead hole, and over/under the left leather strand.
- Weave the Length: Repeat this figure-eight ladder stitch pattern, securing one crystal bead between the leather strands at a time until the wrap reaches double or triple your wrist length.
- Finish with Button: Tie a secure knot in the thread and leather strands together at the end. Thread an pewter or antique brass metal button onto one leather tail, knot it securely, and trim excess cord.
Tips & Variations
- Tip: Keep the leather strands taut on a clipboard or bead board while weaving to ensure even spacing between crystal beads.
- Variation: Use matte wooden beads paired with natural cotton cord instead of leather for a vegan, rustic texture.
What You Need
- 1.5mm round leather cord (Natural brown or black)
- 4mm faceted glass crystal beads
- Fireline braided beading thread & size 10 beading needle
- Antique metal shank button
- Clipboard & scissors
4. Iridescent Sea Glass & Braided Cord Slider Bracelet
What This Idea Means
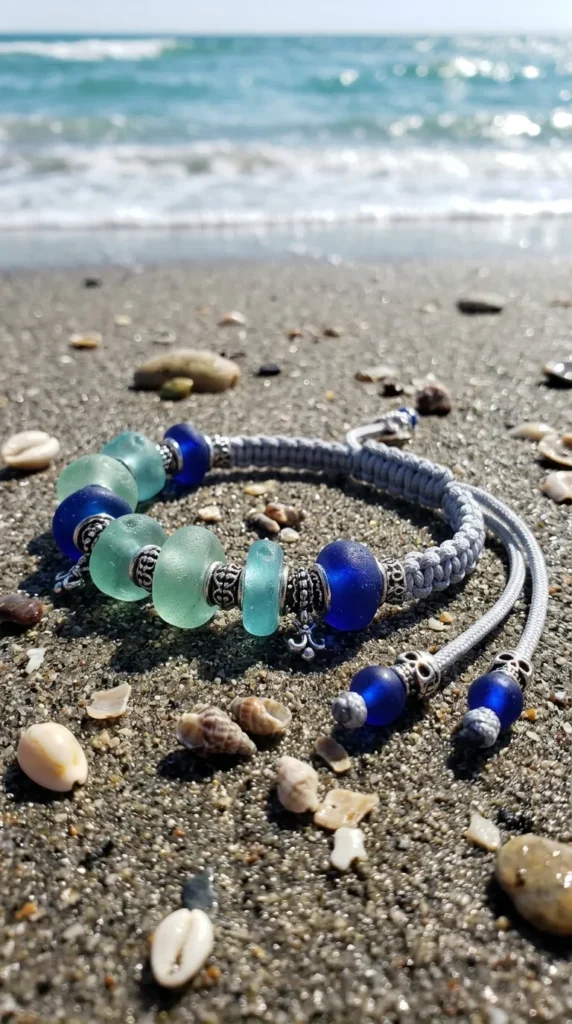
Capturing coastal tranquility, this bracelet features frosted sea glass beads strung on an adjustable, braided nylon cord. Completed with a sliding macramé knot, it offers a custom fit and waterproof durability perfect for beach lovers.
How to Make It
- Prepare Cord Base: Cut two 15-inch pieces of 1mm Chinese knotting cord or waxed polyester cord.
- String Sea Glass: Thread 5 to 7 frosted sea glass beads (in ocean shades like cobalt, seafoam green, and soft blue) onto the center of one cord strand. Secure beads in place by tying simple overhand knots on either side of the bead cluster.
- Create Sliding Closure: Cross the two loose ends of the bracelet cord over each other in opposite directions.
- Knot Macramé Slider: Take a separate 6-inch piece of cord and tie 4 to 5 square macramé knots around the crossed cords to form a functional sliding knot.
- Cap the Ends: Add a small silver accent bead to the 4 loose cord ends, tie tight end knots, and trim excess string. Gently singe cord ends with a lighter to prevent fraying.
Tips & Variations
- Tip: When using a lighter to melt synthetic cord tips on the sliding knot, melt carefully so you don’t fuse the slider to the main bracelet strands.
- Variation: Add small silver sea shell or starfish charms between the sea glass beads for extra coastal flair.
What You Need
- Frosted sea glass beads (8mm round or pebble shapes)
- 1mm Chinese knotting cord or waxed polyester cord
- Small silver end accent beads
- Sharp scissors & handheld lighter
- Ruler or tape measure
5. Chunky Polymer Clay Heishi & Letter Bead Name Bracelet
What This Idea Means
Playful, vibrant, and highly customizable, this design mixes colorful 6mm polymer clay disc beads (heishi beads) with acrylic letter beads to spell out names, inspirational mantras, or favorite places. It’s a staple for friendship bracelet trading and personalized gifting.
How to Make It
- Design Layout: Lay out your letter beads on a bead mat to spell your chosen word (e.g., “CREATIVE”, “DREAM”, or custom names).
- Measure Elastic: Cut a 9-inch strip of 0.8mm stretch cord and secure one end with a bead stopper.
- String Color Sections: Thread polymer clay heishi beads in blocks of color (e.g., 2 inches of pastel turquoise, followed by gold spacer rings).
- Insert Letter Center: Insert your prepared letter beads in the middle of the strand, placing small brass spacer discs between each letter for readability.
- Finish Pattern: Mirror the initial color block pattern on the second half of the bracelet. Tie a tight surgeon’s knot, glue, and tuck the knot into an adjacent wide-hole bead.
Tips & Variations
- Tip: Grouping colors in ombre gradients (dark pink transitioning to white) creates a balanced, high-end look on simple heishi strands.
- Variation: Replace letter beads with gold evil eye beads or smiley face discs for a fun, eclectic charm bracelet.
What You Need
- 6mm polymer clay heishi disc beads (Assorted colors)
- Acrylic letter beads
- Flat gold/brass spacer discs
- 0.8mm clear elastic stretch cord
- Jewelry glue & bead stopper
6. Vintage Pearl & Brass Chain Mixed-Media Bracelet
What This Idea Means
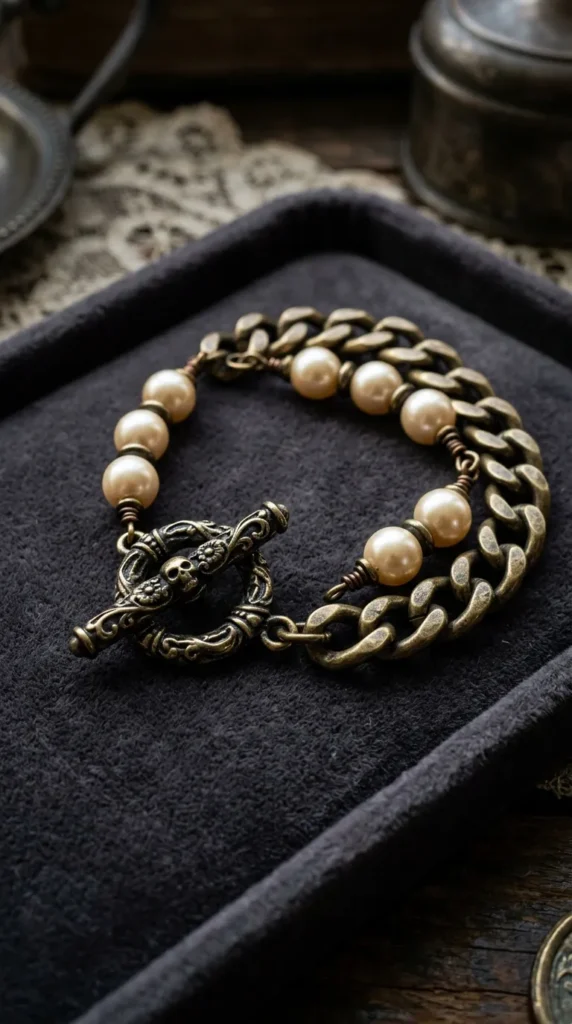
Blending romantic anti-modern charm with edgy industrial details, this bracelet alternates sections of lustrous glass pearls with heavy-link antique brass chains, joined by decorative jump rings and an ornate toggle clasp.
How to Make It
- Prepare Chain Sections: Cut two 2-inch pieces of medium-link antique brass curb chain using wire cutters.
- Assemble Pearl Strand: Cut a 4-inch piece of 24-gauge brass craft wire. Make a wrapped loop on one end, thread five 6mm glass pearl beads, and create a wrapped loop on the opposite end.
- Connect Components: Connect the center pearl wire unit between the two brass chain sections using 6mm brass jump rings.
- Attach Toggle Clasp: Attach one half of an ornate brass toggle clasp to the open end of each chain section using sturdy jump rings.
- Add Dangling Charm: Hang a small vintage key or coin charm near the toggle clasp for an extra touch of detail.
Tips & Variations
- Tip: Use two pairs of flat-nose pliers to twist jump rings open sideways rather than pulling them apart, maintaining their structural round shape.
- Variation: Swap brass hardware for shiny polished sterling silver chains and dark gunmetal accents for a cool-toned contrast.
What You Need
- 6mm glass or freshwater pearls
- Antique brass curb chain
- 24-gauge brass craft wire & 6mm jump rings
- Ornate brass toggle clasp & vintage charm
- Flush cutters, round-nose pliers, & flat-nose pliers


7. Terrazzo Polymer Clay & Gold Wire Geometric Cuff
What This Idea Means
Modern art meets jewelry design in this structural cuff. Hand-sculpted polymer clay beads with speckled terrazzo patterns are threaded onto a semi-rigid, pre-formed gold memory wire framework that wraps elegantly around the wrist without clasps.
How to Make It
- Craft Terrazzo Beads: Roll white polymer clay into smooth 10mm tubes. Roll tiny specks of black, terracotta, and teal clay, press them onto the white clay surface, and roll smooth.
- Pierce and Bake: Cut the terrazzo clay into geometric tube and cube beads. Pierce central holes with a wooden toothpick and bake at 275°F (135°C) for 30 minutes. Let cool.
- Cut Memory Wire: Cut 2.5 coils of bracelet memory wire using heavy-duty memory wire cutters (never use standard craft pliers).
- End Loop: Turn a tiny outer loop at one end of the memory wire using heavy-duty round-nose pliers.
- String Beads: Alternate your handmade terrazzo clay beads with flat gold metallic disc beads along the coils. Turn a matching outer loop at the opposite wire end to lock the beads in place.
Tips & Variations
- Tip: Always use dedicated memory wire cutters; memory wire is tempered steel and will ruin standard jewelry wire cutters.
- Variation: Use marbled metallic clay (gold mixed with navy blue) for a luxurious midnight-stone look.
What You Need
- Polymer clay (White, Black, Terracotta, Teal)
- Bracelet memory wire (2.5 coils)
- Flat gold metallic disc beads
- Memory wire cutters & heavy round-nose pliers
- Toothpicks & ceramic baking tray
8. Ethereal Faceted Fluorite & Silver Wire-Wrapped Bar Bracelet
What This Idea Means
Highlighting delicate metalworking, this graceful bracelet features a horizontal bar of wire-wrapped, faceted fluorite gemstone beads attached to a double strand of fine sterling silver chain. Fluorite’s natural green and purple bands lend an ethereal, crystal-clear glow.
How to Make It
- Construct Gemstone Bar: Cut a 3-inch length of 22-gauge sterling silver wire. Form a small wrapped loop at one end.
- Thread Fluorite Beads: String 8 to 10 micro-faceted 4mm fluorite beads onto the wire, arranging them so their purple-to-green color transitions look smooth.
- Complete Bar Loops: Create a matching wrapped loop at the opposite wire end, trimming excess wire flush.
- Prepare Double Chains: Cut four 3-inch lengths of fine sterling silver cable chain. Connect two chain lengths to each end loop of the fluorite bar using small silver jump rings.
- Attach Clasp Assembly: Connect the free ends of the double chains to a silver spring ring clasp and extension chain setup.
Tips & Variations
- Tip: Tuck the cut tail of wrapped wire loops tightly against the bead hole using chain-nose pliers so it won’t snag on knit clothing.
- Variation: Use faceted garnet or amethyst beads paired with gold wire for a warmer jewel-toned aesthetic.
What You Need
- 4mm micro-faceted fluorite beads (Green and purple shades)
- 22-gauge sterling silver craft wire & 4mm jump rings
- Fine sterling silver cable chain
- Sterling silver spring ring clasp & extension chain
- Complete jewelry pliers set (Round-nose, Chain-nose, Cutters)
9. Chevron Knot Friendship Bracelet with Metallic Accent Beads
What This Idea Means
Elevating traditional thread friendship bracelets, this chevron pattern design uses embroidery floss combined with small metallic seed beads woven along the outer V-shaped edges for a bohemian festival accessory.
How to Make It
- Cut Floss Strands: Cut 6 strands of embroidery floss (3 strands each of two complementary colors) to 36 inches. Knot them together at the top, leaving a 2-inch braid for the tie closure.
- Set Up Chevron Rows: Arrange strands symmetrically by color (e.g., A-B-C-C-B-A).
- Knot Left Side: Take the outer left strand (A) and tie forward knots over strands B and C toward the center.
- Knot Right Side & Add Bead: Take the outer right strand (A), thread 1 metallic gold seed bead onto it, and tie backward knots over strands B and C to meet in the center.
- Join in Center: Tie the two central A strands together with a single forward knot to complete the V-chevron point.
- Repeat Pattern: Repeat this process row by row until the braided knotting reaches 6 inches, then finish with a matching end braid.
Tips & Variations
- Tip: Clip the top knot to a clipboard or safety pin it to your jeans to keep consistent tension while working double knots.
- Variation: Use monochrome embroidery thread (all shades of grey/charcoal) with bright silver seed beads for a subtle geometric pattern.
What You Need
- Cotton embroidery floss (2 or 3 colors)
- Size 8/0 metallic gold or silver seed beads
- Clipboard or safety pin
- Tapestry needle & scissors
10. Natural Wooden Bead & Tassel Boho Stretch Bracelet
What This Idea Means
Earthy, grounding, and textured, this easy stretch bracelet combines matte natural sandalwood or rosewood beads with a soft cotton thread tassel and a single focal brass charm. It brings an organic, yoga-inspired feel to your everyday wrist wear.
How to Make It
- Prepare Cord: Cut a 9-inch length of 1mm thick stretch elastic cord.
- Make Mini Tassel: Wrap embroidery thread around two fingers 20 times. Slide a small jump ring through the top loops, wrap thread tightly around the top neck to secure, and cut bottom loops open.
- Pattern Stringing: Thread 8mm natural wooden beads onto the stretch cord until halfway filled.
- Add Center Accents: Thread 1 brass spacer bead, your handmade thread tassel (via its jump ring), a brass leaf or lotus charm, and a second brass spacer bead.
- Complete Strand: String remaining wooden beads. Tie a secure triple knot, apply clear jewelry cement, and slide the knot inside the center hole of a wooden bead.
Tips & Variations
- Tip: Sandalwood beads offer a subtle, natural aromatic scent that makes wearing the bracelet a calming sensory experience.
- Variation: Intertwine matte lava stone beads into the strand so you can diffuse essential oils onto your wrist throughout the day.
What You Need
- 8mm natural wooden beads (Sandalwood or Rosewood)
- 1mm clear stretch cord
- Embroidery floss (For tassel) & brass charms
- Jump rings & brass spacer beads
- Jewelry glue & scissors
11. Romantic Rose Quartz & Floating Pearl Cable Bracelet
What This Idea Means
Exuding soft feminine charm, this delicate chain bracelet features smooth round rose quartz beads and floating white pearls suspended along a dainty rose gold cable chain using fine wire-wrapped eye pins.
How to Make It
- Prepare Bead Links: Thread 6mm rose quartz beads and 5mm freshwater pearls onto individual 1-inch rose gold eye pins.
- Wrap Top Loops: Create wrapped loops on the open end of each eye pin to turn every bead into a secure link connector.
- Cut Chain Segments: Cut equal 1-inch segments of rose gold cable chain using fine wire cutters.
- Assemble Alternating Links: Connect a rose quartz bead link to a chain segment, then attach a pearl link, alternating components until reaching 6.5 inches.
- Attach Clasp: Connect a dainty rose gold lobster clasp to one end and a tiny heart charm onto the opposite tail end.
Tips & Variations
- Tip: Keep the wire-wrapped loops uniform in size by marking a line on your round-nose pliers with a permanent marker to guide placement.
- Variation: Use pale aquamarine beads with polished silver chain for a sea-inspired pastel variation.
What You Need
- 6mm round rose quartz beads
- 5mm freshwater pearls
- Rose gold eye pins & fine rose gold cable chain
- Rose gold lobster clasp & small heart charm
- Round-nose, chain-nose, & wire-cutting pliers
12. Edgy Black Onyx & Gunmetal Spike Charm Stretch Bracelet
What This Idea Means
For those who prefer a darker, edgy aesthetic, this bracelet combines glossy black onyx beads with gunmetal spacer rings and tiny hanging cone spike charms. It adds bold texture and subtle gothic flair to monochromatic outfits.
How to Make It
- Prep Cord: Cut 9 inches of heavy-duty 1mm black elastic cord.
- Pattern Assembly: Thread smooth 6mm glossy black onyx beads alternating with thin gunmetal micro-rhondelle spacer beads.
- Attach Spikes: Every 5 onyx beads, string a small gunmetal hanging bail fitted with a 10mm cone spike charm. Space 3 to 5 spikes symmetrically along the front arc.
- Check Sizing: Continue adding onyx and gunmetal spacers around the rest of the cord until it comfortably fits your wrist.
- Secure Knot: Tie a tight surgeon’s knot, douse with black or clear jewelry adhesive, and pull the knot inside one of the onyx bead holes to hide it.
Tips & Variations
- Tip: Using black elastic cord rather than clear cord keeps the string invisible between dark onyx beads.
- Variation: Mix matte black onyx beads with glossy black onyx for a tactile, tonal contrast without adding shiny hardware.
What You Need
- 6mm glossy black onyx round beads
- Gunmetal micro-rhondelle spacer beads
- Small gunmetal cone spike charms & bails
- 1mm black stretch elastic cord
- Jewelry adhesive & scissors
13. Upcycled Vintage Button & Cord Toggle Bracelet
What This Idea Means
Giving new life to discarded treasures, this eco-craft turns mismatched vintage mother-of-pearl, shank, and brass buttons into a textured statement bracelet connected with durable knotted satin cord.
How to Make It
- Curate Buttons: Select 7 to 9 flat vintage buttons (12mm to 18mm wide) with complementary tones (e.g., cream mother-of-pearl, brass, and carved bone).
- Prepare Cord: Cut two 20-inch pieces of 1mm black or tan satin rat-tail cord. Fold in half and knot at the top to form a closure loop.
- Weave Buttons: Thread the two cord tails through opposing holes of your first button (or through the rear loop if using shank buttons).
- Knot Between Buttons: Tie a tight square knot or simple overhand knot in the cord immediately after each button to lock it in place.
- Complete Strand: Continue threading buttons and knotting between them until reaching desired wrist length. Finish by tying a large vintage metal button at the end to serve as the toggle closure.
Tips & Variations
- Tip: If button holes are small, stiffen the tips of your cord by dipping them in super glue and letting them dry into a hard “needle” tip before threading.
- Variation: Use colorful 1950s Bakelite buttons for a bright retro pop art aesthetic.
What You Need
- Assorted vintage buttons (Mother-of-pearl, metal, shank styles)
- 1mm satin rat-tail cord
- Super glue (for cord tip stiffening)
- Scissors & ruler


14. Celestial Lapis Lazuli & Gold Star Charm Wrap Bracelet
What This Idea Means
Channeling the beauty of the night sky, this deep blue lapis lazuli bead bracelet features natural golden pyrite specks within the stones, paired with dangling gold star and crescent moon charms.
How to Make It
- Measure Double Elastic: Cut a 16-inch piece of 0.7mm elastic cord to create a double-wrap stretch bracelet.
- String Lapis Beads: Thread deep blue 4mm lapis lazuli round beads continuously onto the cord.
- Incorporate Celestial Charms: At regular intervals (every 1.5 inches), string tiny gold star and crescent moon charms fitted with tiny jump rings.
- Complete Double Strand: Continue stringing until the strand easily wraps twice around your wrist.
- Secure & Hide Knot: Tie a double surgeon’s knot tightly, apply jewelry glue, and hide the knot inside a wide-hole gold spacer bead.
Tips & Variations
- Tip: Inspect your lapis lazuli beads under bright light to pick strands with rich royal blue saturation and bright gold pyrite flecks.
- Variation: Use dark blue sandstone (Goldstone) beads for an ultra-glittery planetarium effect.
What You Need
- 4mm deep blue lapis lazuli round beads
- Small gold star & crescent moon charms with jump rings
- 4mm gold wide-hole spacer beads
- 0.7mm clear stretch elastic cord
- Jewelry glue & scissors
15. Tactile Felted Wool & Glass Seed Bead Garland Bracelet
What This Idea Means
Cozy, soft, and playful, this textile bracelet features tiny hand-felted colorful wool felt balls interspaced with sparkling glass seed beads, strung on a soft elastic base for a fun winter accessory.
How to Make It
- Prepare Felt Balls: Obtain or hand-roll 10mm wool felt balls in soft pastel or winter berry shades.
- Thread Beading Needle: Thread a sharp sewing needle with strong 0.6mm stretch elastic thread.
- Pattern Assembly: Push the needle directly through the center of a felt ball.
- Add Seed Bead Spacer: Thread three 8/0 metallic silver seed beads onto the elastic thread before piercing the next felt ball.
- Complete Loop: Repeat alternating felt balls and seed bead clusters until the bracelet reaches wrist circumference. Tie a firm square knot and tuck loose cord ends back into the center of a felt ball.
Tips & Variations
- Tip: Use a sharp, thin embroidery or sewing needle so you can easily pierce the dense wool felt balls without tearing them.
- Variation: Add small silver jingle bells between felt balls for a festive holiday edition.
What You Need
- 10mm wool felt balls (Assorted colors)
- Size 8/0 metallic silver glass seed beads
- 0.6mm stretch elastic thread & sharp sewing needle
- Scissors & tape measure
16. Sculptural Brass Tube & Turquoise Gemstone Bead Bar
What This Idea Means
Modern geometry meets Southwestern flair. This sleek design centers a long curved brass tube bead flanked by vibrant turquoise round beads on a fine gold curb chain, forming a structured bar bracelet with a bold pop of color.
How to Make It
- Prepare Curved Tube: Select a 1.5-inch curved brass tube bead (noodle bead).
- Thread Core Wire: Cut a 4-inch piece of 22-gauge brass craft wire. Thread the curved brass tube onto the center of the wire.
- Add Turquoise Accents: Thread two 6mm natural turquoise round beads onto the wire on each side of the brass tube.
- Create End Loops: Form wire-wrapped loops at both outer ends of the wire assembly, trimming excess wire flush.
- Attach Side Chains: Cut two 2.5-inch pieces of gold curb chain. Connect one chain piece to each side loop of the turquoise/brass bar. Fasten a lobster clasp to the open chain ends.
Tips & Variations
- Tip: Gently curve the brass tube along the natural arc of your wrist before wiring so it sits flush against the skin.
- Variation: Replace turquoise with red coral beads or black onyx beads for a bold color twist.
What You Need
- 1.5-inch curved brass tube noodle bead
- 6mm natural turquoise round beads
- 22-gauge brass craft wire
- Fine gold curb chain & lobster clasp
- Round-nose, flat-nose, & wire-cutting pliers
17. Woven Seed Bead Peyote Stitch Cuff Bracelet
What This Idea Means
Intricate and rewarding, off-loom peyote stitching weaves hundreds of tiny glass cylinder seed beads into a flexible geometric band that fits like a smooth fabric strap around the wrist.
How to Make It
- Set Up Thread: Thread a size 12 beading needle with 5 feet of strong Fireline beading thread.
- Pick Up Initial Rows: Thread an even number (e.g., 12 beads) of Miyuki Delica seed beads to establish your cuff’s width.
- Peyote Weave: Pass the needle back through the second-to-last bead, pick up a new bead, skip a bead in the base row, and pass through the next. Continue weaving back and forth.
- Build Geometric Pattern: Follow a grid chart to introduce contrasting colored beads, forming chevron or diamond patterns as the band grows.
- Attach Tube Clasp: Once the band measures 6.5 inches, stitch the final bead row directly into the loops of a multi-strand slide tube clasp, locking threads securely.
Tips & Variations
- Tip: Miyuki Delica cylinder beads are key for peyote stitch; their uniform shape ensures rows lock together flush without gaps.
- Variation: Use metallic gold and matte white beads for a clean modern geometric design.
What You Need
- Miyuki Delica 11/0 cylinder seed beads (2 or 3 colors)
- Fireline 6 lb beading thread & size 12 beading needle
- Multi-strand slide tube clasp
- Bead mat & micro scissors
18. Chunky Freshwater Coin Pearl & Gold Paperclip Chain Bracelet
What This Idea Means
Statement pearls are reimagined for modern street-style. Flat, coin-shaped freshwater pearls are linked with oversized gold paperclip chain links, secured with an exaggerated circle toggle clasp.
How to Make It
- Wire-Wrap Coin Pearls: Thread 12mm flat coin-shaped freshwater pearls onto individual gold headpins. Create wire-wrapped loops at the top of each pearl.
- Prep Chain Links: Cut a 7-inch piece of oversized gold paperclip chain.
- Attach Pearls to Links: Connect a wire-wrapped coin pearl to every second paperclip chain link using sturdy gold jump rings.
- Attach Oversized Clasp: Connect a 15mm heavy gold circle toggle clasp to the ends of the paperclip chain using heavy-duty 8mm jump rings.
- Clean & Inspect: Ensure all jump rings are fully closed to hold the weight of the large pearls securely.
Tips & Variations
- Tip: Coin pearls have unique natural ridges and iridescent sheens; select pearls with smooth, flat surfaces so they rest comfortably on the wrist.
- Variation: Add small gold initial charms next to each coin pearl for personalized heirloom styling.
What You Need
- 12mm flat coin-shaped freshwater pearls
- Oversized gold paperclip chain
- Gold headpins, 8mm jump rings, & large toggle clasp
- Round-nose pliers, chain-nose pliers, & wire cutters
19. Southwestern Heishi Shell & Turquoise Disc Stacking Strand
What This Idea Means
Embracing classic coastal-desert aesthetic, this stacking bracelet pairs white olive shell heishi discs with natural blue-green turquoise discs, separated by raw silver spacer beads.
How to Make It
- Prep Elastic Base: Cut an 8.5-inch piece of 0.8mm stretch cord and clip a bead stopper on one end.
- Pattern Threading: String white shell heishi discs for 1 inch.
- Add Turquoise Blocks: Insert a section of flat blue turquoise disc beads (approx. 0.5 inches wide).
- Incorporate Silver Accents: Add flat sterling silver saucers or ring spacers between the shell and turquoise transitions.
- Repeat and Tie: Repeat pattern until filled to wrist size. Knot securely with a surgeon’s knot, seal with jewelry glue, and hide knot within a wider silver bead hole.
Tips & Variations
- Tip: Check that shell heishi disc edges are smooth before stringing so they glide comfortably against your skin.
- Variation: Substitute white shell beads for dark coconut shell discs to create a richer, darker contrast with turquoise.
What You Need
- Flat white olive shell heishi disc beads
- Flat turquoise disc beads
- Sterling silver saucer spacer beads
- 0.8mm stretch elastic cord
- Bead stopper & jewelry glue
20. Sparkly Crystal Rondelle & Memory Wire Bangle Stack
What This Idea Means
Effortless glam in seconds! This multi-wrap memory wire bangle uses faceted glass crystal rondelle beads that catch light from every angle, creating the look of multiple stacked diamond bangles in a single wrap-on piece.
How to Make It
- Cut Memory Wire Coils: Cut 4 full coils of bracelet memory wire using heavy-duty memory wire cutters.
- Form Starting Loop: Bend a tight round loop at one wire end using heavy round-nose pliers.
- String Faceted Crystals: Thread 3mm x 4mm faceted glass crystal rondelle beads continuously onto the memory wire coils.
- Add Metallic Spacers: Insert metallic silver micro-spacer beads every 20 crystal beads to add extra sparkle and visual rhythm.
- Finish End Loop: Once all 4 coils are filled, turn a matching round loop at the trailing wire end to lock all beads permanently.
Tips & Variations
- Tip: When turning memory wire loops, apply firm grip pressure with heavy pliers as memory wire resists bending more than standard craft wire.
- Variation: Use champagne gold crystal rondelles paired with rose gold memory wire for a warm romantic evening stack.
What You Need
- 3mm x 4mm faceted glass crystal rondelle beads (Clear or Champagne)
- Metallic silver micro-spacer beads
- Bracelet memory wire (4 full coils)
- Heavy-duty memory wire cutters & heavy round-nose pliers


Discover more from DIY IDEAS
Subscribe to get the latest posts sent to your email.